
What is it?
Macro photography gets you closer to things, it makes small things larger on your sensor or film, by doing this it opens up the world of photography to things that you would walk past or miss on a daily basis. Insects flowers and many more things look amazing when you get closer to them than the naked eye. Here is what a macro lens and extension tubes can do for your photography.
A dedicated Macro lens will allow you to take pictures of objects, closer to the front of the lens than your kit lens. This allows you to get closer to your subject making it up to 5x its actual size on the sensor. A lens like the Canon 65mm MP-E Macro is dedicated to taking macro images and will focus on very short distances from the lens. But, that lens will only do that one thing, it does do it quite well though, but it is not as versatile as the Canon 100mm F2.8 Macro LIS this lens can be used to do portrait work as well as other things.
What if you wanted to learn about Macro photography but didn’t want to buy a macro lens just in case you tried it and really didn’t like it?
Extension tubes are your answer, they will convert almost any lens to do macro photography. A set set will cost you about $225 compared to the price of a dedicated macro lens that is great Value.
I have a set of Kenko extension tubes, they attach between your camera and lens, and move the lens forward. They come in a set of three, 12mm, 24mm, and 36mm and you can use one of them at a time or all three of them at the same time, they will allow you to focus closer to your subject using your existing lenses.
How do I use it on my camera?
I will be talking about how the ones I have work with my Canon camera and lenses. There may be some slight differences with other brands of cameras and extension tubes.
The set I have use a pass through system, there are contacts that allow the lens and camera to communicate with each other, so the camera will autofocus and set the aperture. You can buy units that do not pass through, they will require manual focusing and you cannot control the aperture, so you can only use the smallest number aperture that lens has, which will limit the depth of field in your photo, when shooting this close, you may need more depth, my advice is to buy the pass through models.
The focusing distance that a lens refers to is measured from the subject to the film or sensor it is being recorded on. A 18-55mm F3.5-5.6 kit lens that has a minimum focusing distance of 25cm, that means that your subject can be as close as 25cm from about the back of the camera.
As the tubes shorten the focusing distance on any lens they are fitted to, you do have to be careful of what you fit them to, as the focusing distance may be shorter than the lens, which would mean that the subject would never be able to be focused on. Wide angle lenses that focus close usually fall into this category, I have a Canon 16-35mm F2.8mm lens that has a minimum focus distance of 24cm, if I put a 12mm extension tube on that lens it cannot focus.
What does it do to my pictures?
Here are some examples taken back to back on a 50mm F1.4 lens with the 12mm 24mm and 36mm tubes and a 100mm Dedicated 1 to 1 Macro Lens, I have also added the tubes to the Macro lens to show what it would do to that lens. All the images were taken on a 5D mark II with ambient light at my desk, hand held and I was focusing on the 1:2.8 marking on the lens, the aperture was set to F2 and I was shooting at 1/250th when using the 50mm and F2.8 at 1/125th when using the 100mm Macro.
Examples
 50mm with 12 mm tube: The photo on the left is the 50mm at standard focusing distance. The photo on the right is using the tube. Note the depth of field or out of focus in the background is starting to disappear very quickly.
 50mm with 24mm tube: Note the out of focus is much more effective, and that the EF-S marking on the top of the lens is almost not readable.
 50mm with 36mm tube: I now am so close that the EF-S marking is not in my picture. Note though that now the 60mm is starting to be out of focus. You can see the details in the gold ring and the rubber on the lens though quite nicely.
 50mm with all three tubes: Note that with all three on the camera, I had to increase the exposure. Note the .8 of the 2.8 is now almost out of focus. The depth of field at this distance would be less than a millimetre.
 100mm Macro: The photo on the left is the 100mm at standard focusing distance. The photo on the right is what the Macro lens can do without the use of an extension tube. This lens also has image stabilisation which can be handy when you are getting close and the smallest of movements will blur your photo.
 I have added the 12mm tube to the 100mm dedicated macro lens to show that if you were to buy the tubes you can then still use them on your dedicated macro as well, and get even closer!
Try This
Here are some images that I have taken with a mixture of lenses with and without tubes. One of these images was taken with a dedicated macro lens. The first person to email me with the correct image and the image settings both aperture and shutter speed will win a set of extension tubes that suit their camera and a 2 hour photo walk around Roma Street Parklands showing how to use them.
 Picture 1
 Picture 2
 Picture 3
 Picture 4
 Picture 5
Email me with your choice and the camera settings for your chance to win the tubes. I will announce the winner once it has been won.
 Star trails and Planes; Canon 5D II, 16mm, F6.7, 189 shots at 20 seconds per shot (About 63 minutes). I didn’t even leave the house for this one, taken from my bedroom balcony, this is the stars the moon and some planes coming into land.
  CityCat at sunset; Canon 5D II, F6.7, 1/20th, ISO 800. Taken at the Hawthorne Ferry Terminal just as the CityCat was leaving. This used a
  All clear on final; Canon 7D, F4.5, 1/1500th, ISO 400. This macro shot was taken in my back garden. Less than five steps from my back door.
 Bulimba Ferry Terminal; Canon 5D II, F2, 1/1500th, ISO 50. I dropped my wife to the terminal and noticed the sun on the terminal building. I took this shot as part of my 365 photo a day
  Sunsets and CityCats; Canon 5D II, F2, 1/45th, ISO 50. I saw the rays as I was driving home and thought the Hawthorne ferry terminal would give me a nice vantage point.
 To Bulimba; Canon 7D, F9.5, 30 seconds, ISO 400. I missed the ferry to Bulimba, and while I was waiting (without a tripod) I put my camera on the ground, propped it up with my wallet and took this
  Dodge; Canon 1000D, F2.8, 1/350th, ISO 400. This was parked just out front of the Jetty Bar at the end of Oxford Street in Bulimba. As it was an old car, I thought I would give it a black and white process.
 Canon 5D II, ISO100 1/40th 16mm F11: By panning I have been able to make this little boy look like he was going faster than he was.
 Canon 5D II, ISO100 1/125th 40mm F6.7: By panning I have made this look like the motorbike was going faster than it actually was, but keeping the subject, the passenger on the back as sharp as possible.
 Canon 5D II, ISO400 1/60th 65mm F5.6: In the rain there is usually less light. Panning has still allowed me to capture the action without blurring the subject.
 Canon 5D II, ISO1600 1/125th 21mm F3.2: By panning I have been able to almost freeze the car in mid-air, but still been able to show that it is moving, all in a very poorly lit environment.
 Canon 20D, ISO800 1/40th 40mm F3.5: The upper limit on the 20D was really ISO400. This ISO800 image is very grainy, but by panning I was able to take this image just before dawn at a 24 Hour race. The darkness allows the viewer to see the glowing brakes better.
 Boat on Brienzsee, Ringgenberg; using a wide angle lens gives the mountain’s behind the boat some perspective.
 Flying Scotsman, Paris; the
  Pimlico Tube Station, London; by taking this photo at 1/8th of a second, the train moving out of the station has been accentuated. By using the right balance of
  Boats for hire, Lake Como; by using a tripod and a long
  Flower bokeh, Rothenburg; by using a very small number
  Spiral staircase, Arc de Triomphe; by using a fisheye lens, the spiral of the staircase has been exaggerated.
 Dole Reflections, Dole, France; by using a
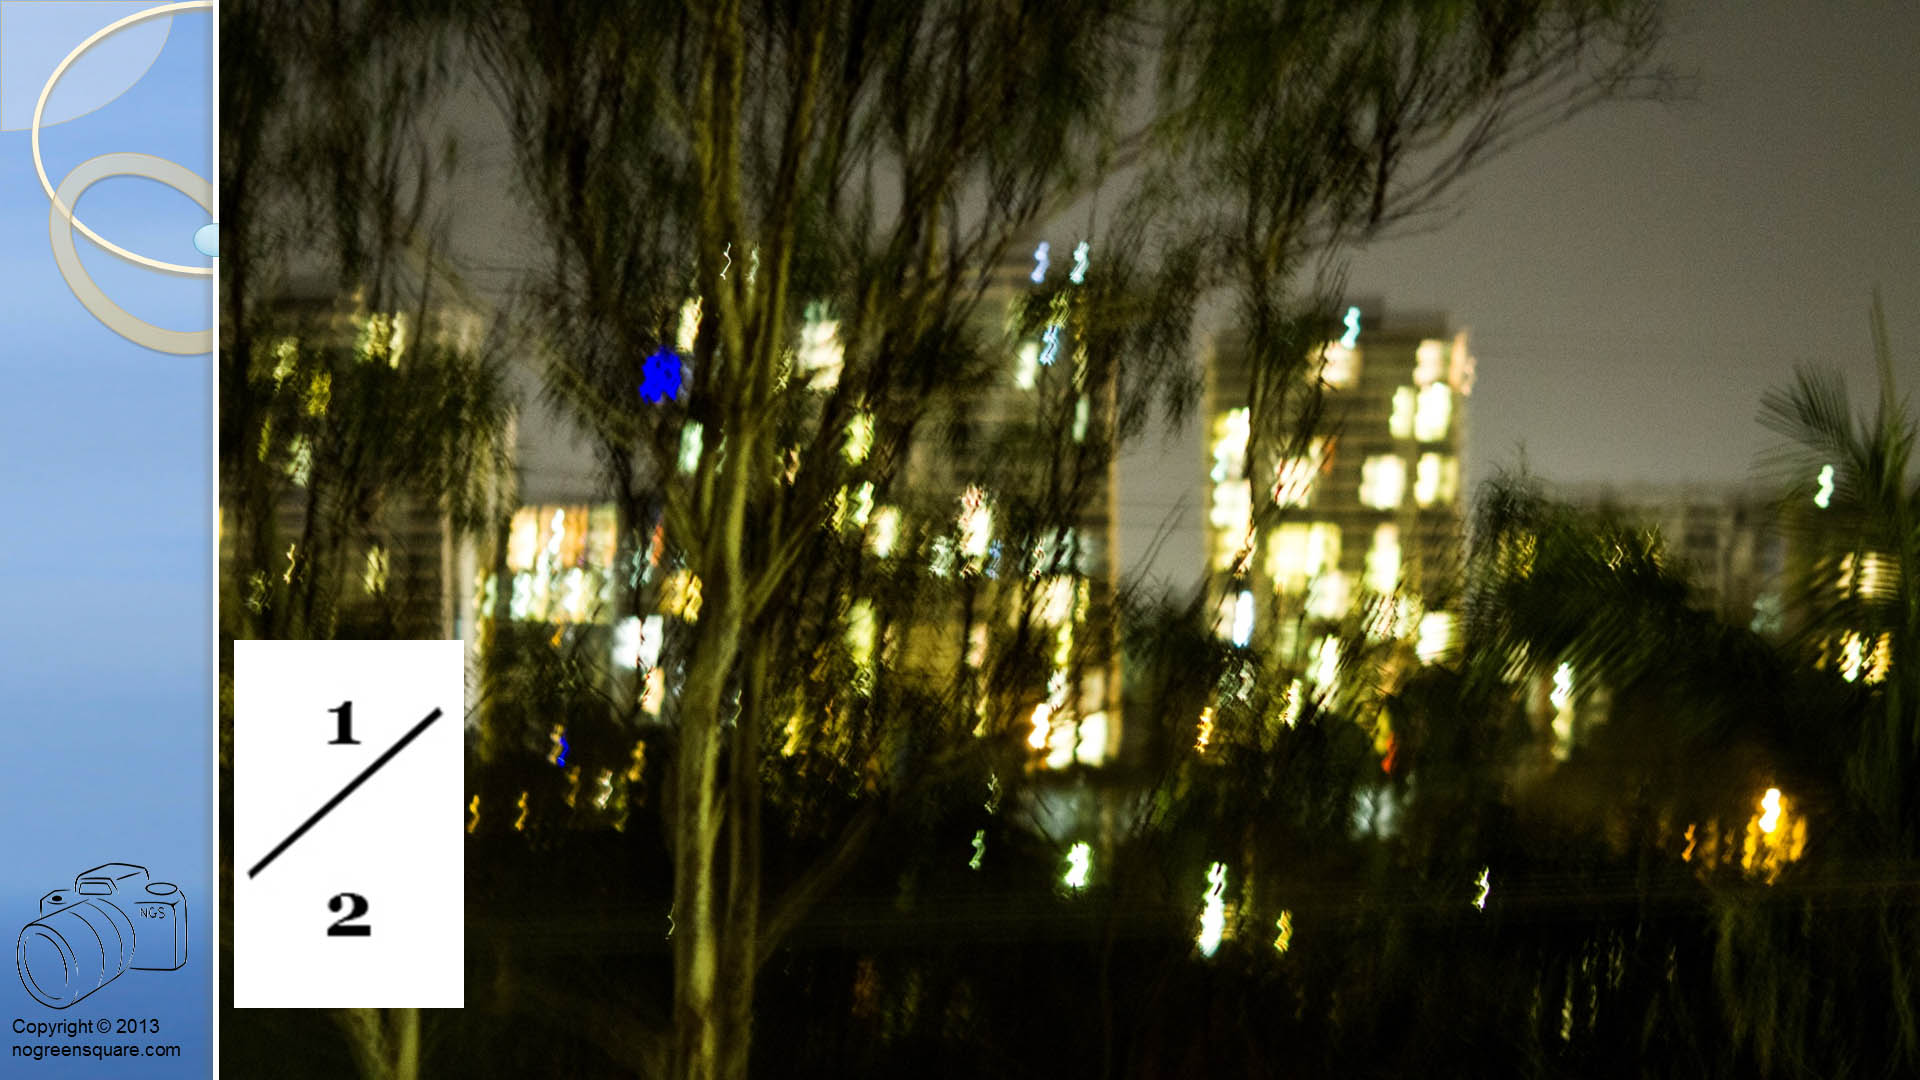
  You can see in this picture that everything is blurry. This is a result of using too slow a shutter speed and the camera moving while you take the picture. This is where an image stabilised lens could have helped keep the camera still enough to avoid the shake that is in this picture.
 In this image, even with a fast enough shutter speed to hold the camera still, the subject was moving and has been blurred. In this case an image stabilised lens would not have helped at all.
 The above shot was taken on the
  You can see that the frogs eye is not sharp in this photo, its slightly closer than the frogs eye. This would have been due to me moving slightly back as I was taking the picture. This was taken at F6.7 the depth of field at this distance and aperture is about 5mm.
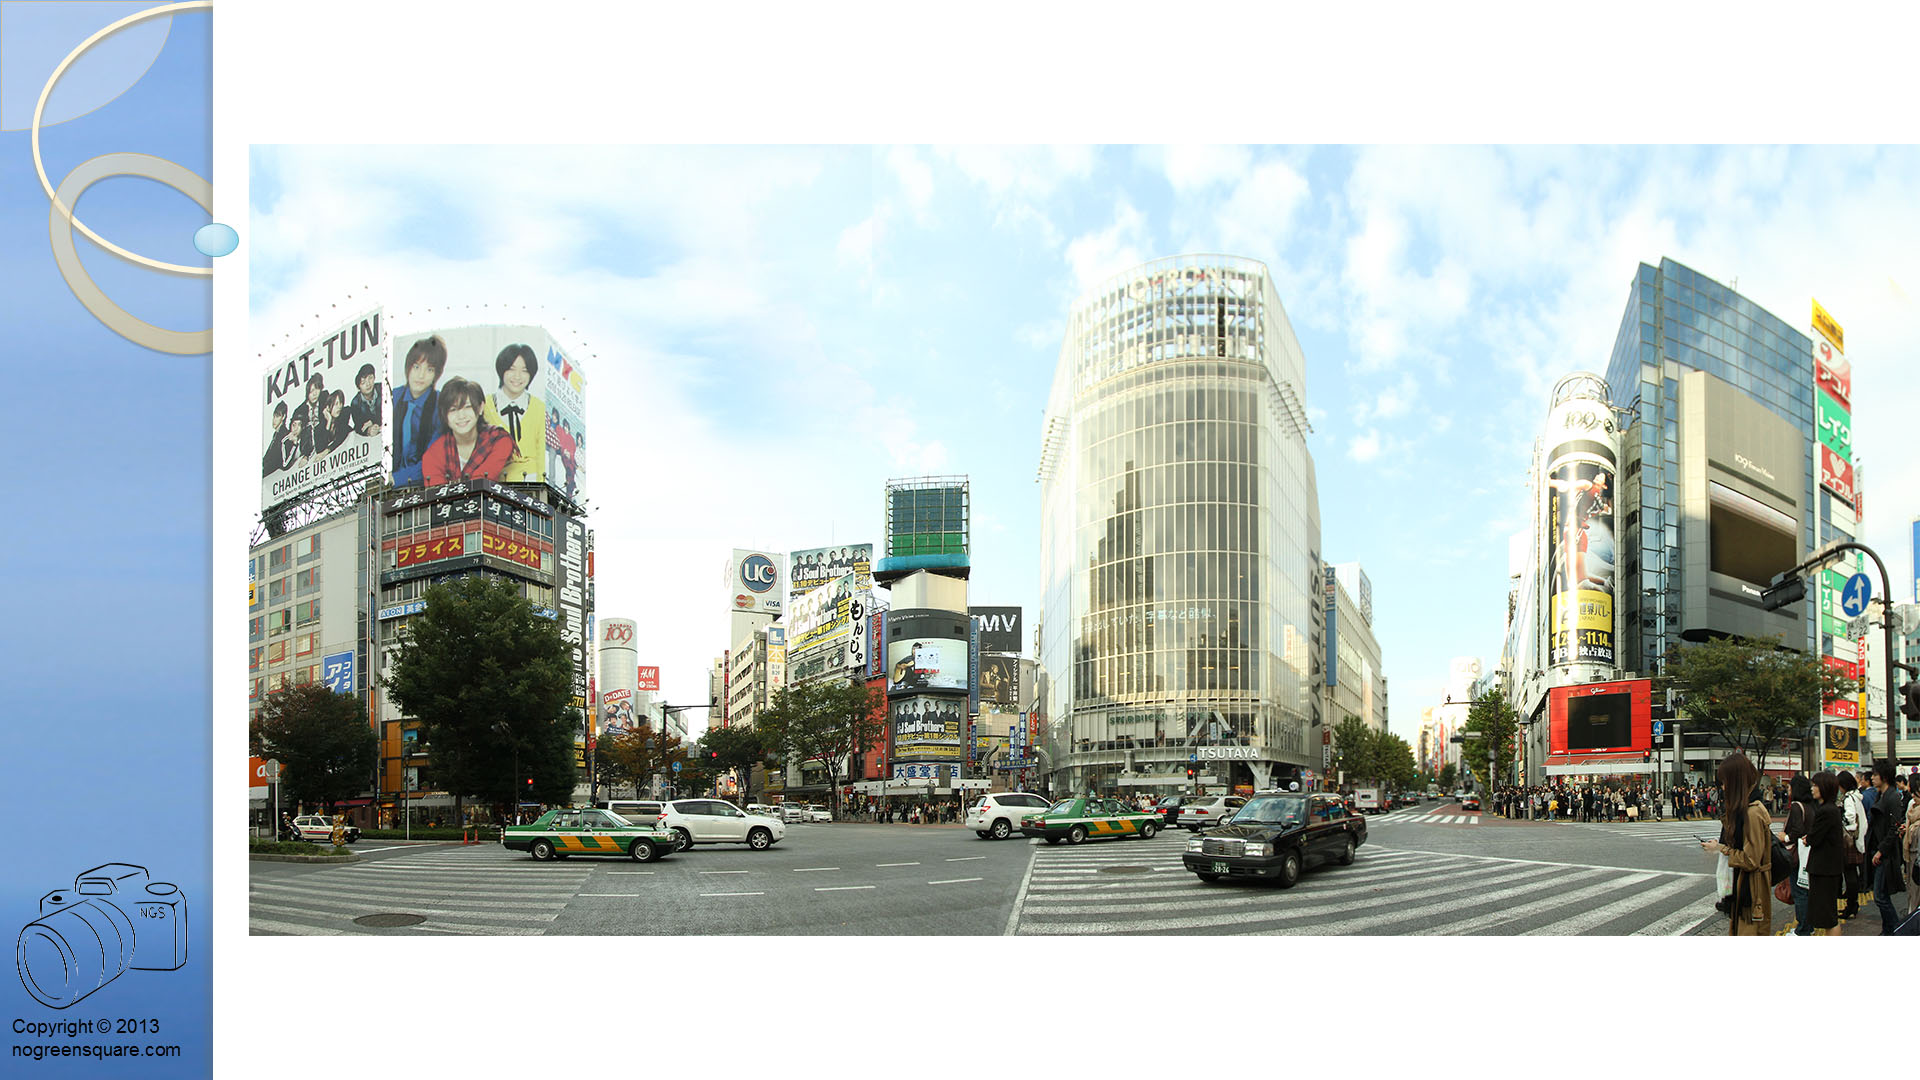
 Shibuya Crossing, Japan; 9 shots. Taken on a Canon EOS 7D at 10mm. If you look carefully, the taxi and white car appear twice as they were moving through the scene as I was taking the images.
 The Milky Way, 11 shots. Taken on a Canon EOS 5D Mark II, and at 18mm the left and right of the photo are opposite horizons.
 Moffat Beach, Australia; 41 shots. The exposure was set for the middle and right of the image and the sun has slightly blown out (created the very bright white areas) on the left.
 Brighton Jetty Classic 2010, Australia; 9 shots taken from a helicopter as it flew left to right.
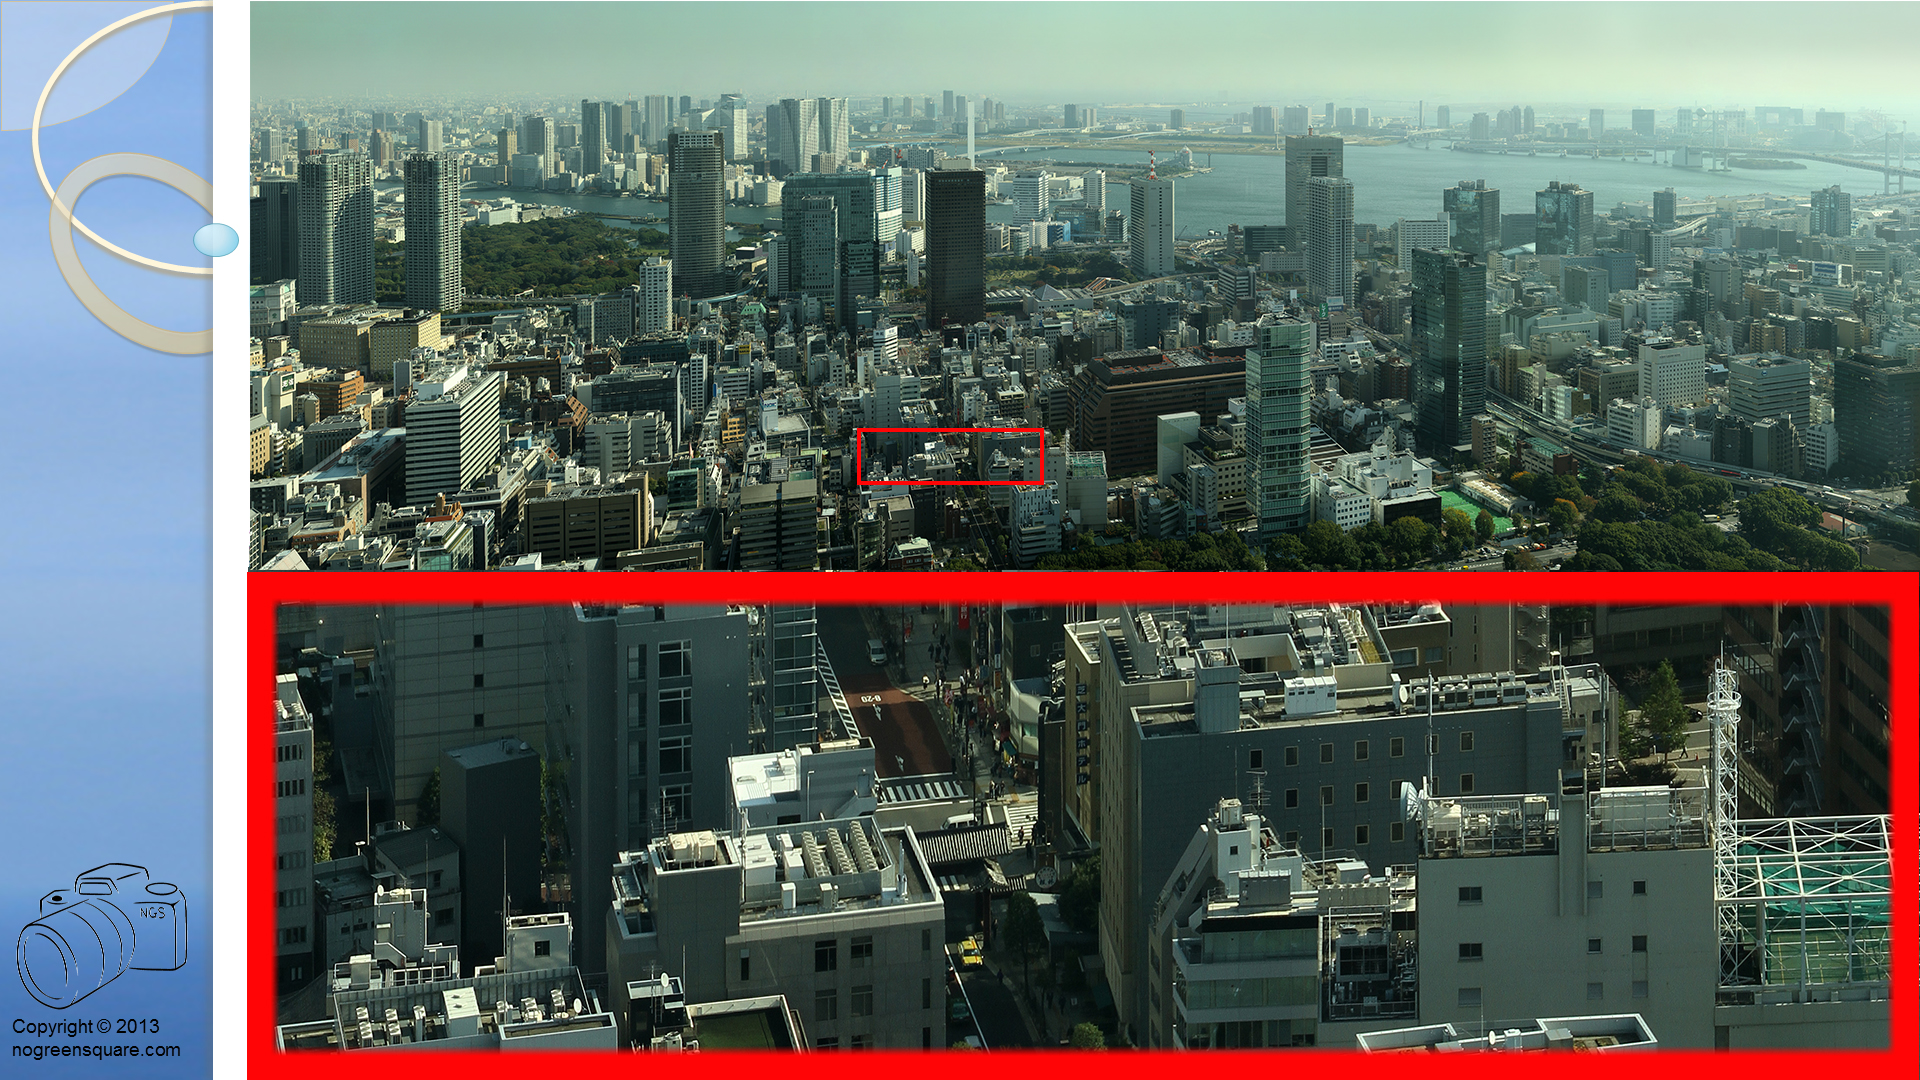
 Tokyo, Japan; 83 shots 3 rows high and 27 shots wide. Taken from the Tokyo Tower, the section in the large red rectangle is a crop of the small section in red on the main picture. This image could be printed 3m tall and would be about 27m long.
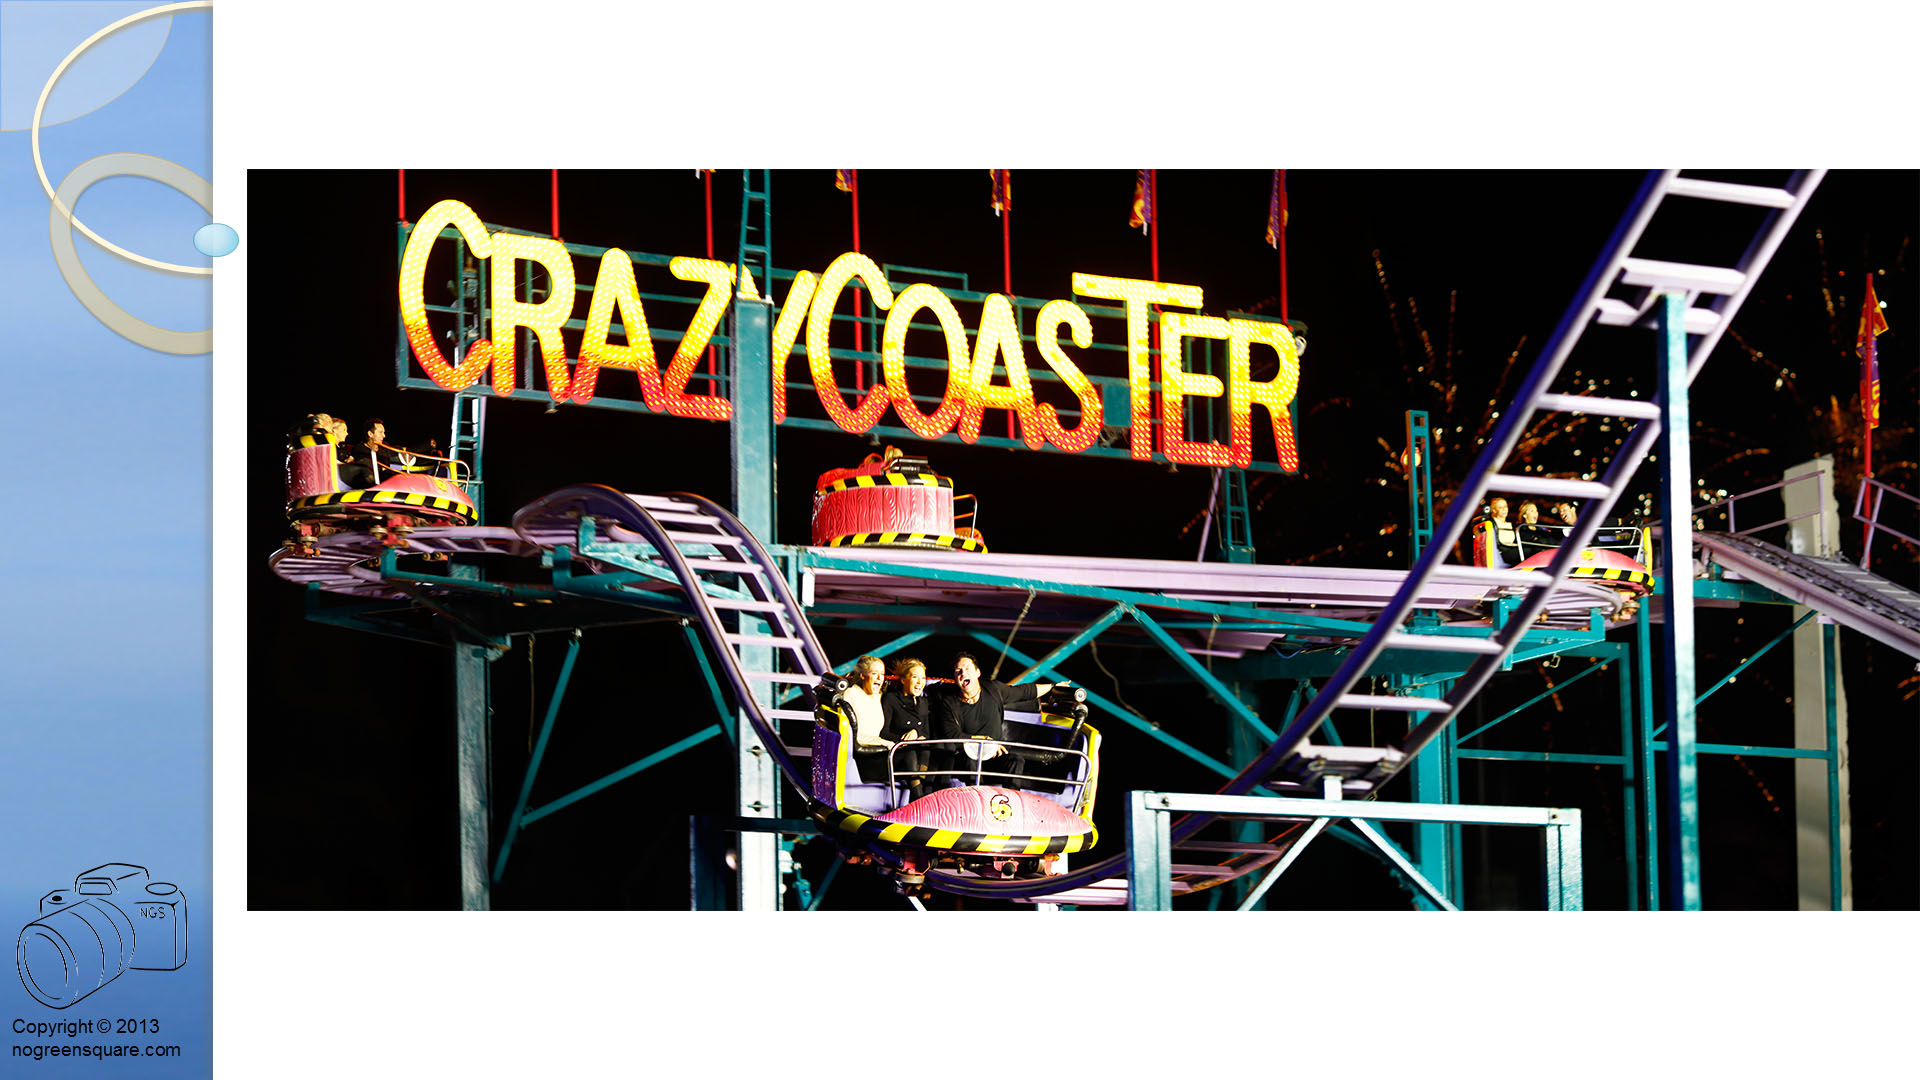
 Crazy Coaster, Brisbane Ekka 2012; These images were never shot to be a panorama, but I saw the opportunity to see if they would work, and it did. If you look carefully, the riders are the same in each car. So dont be scared to give something a go!
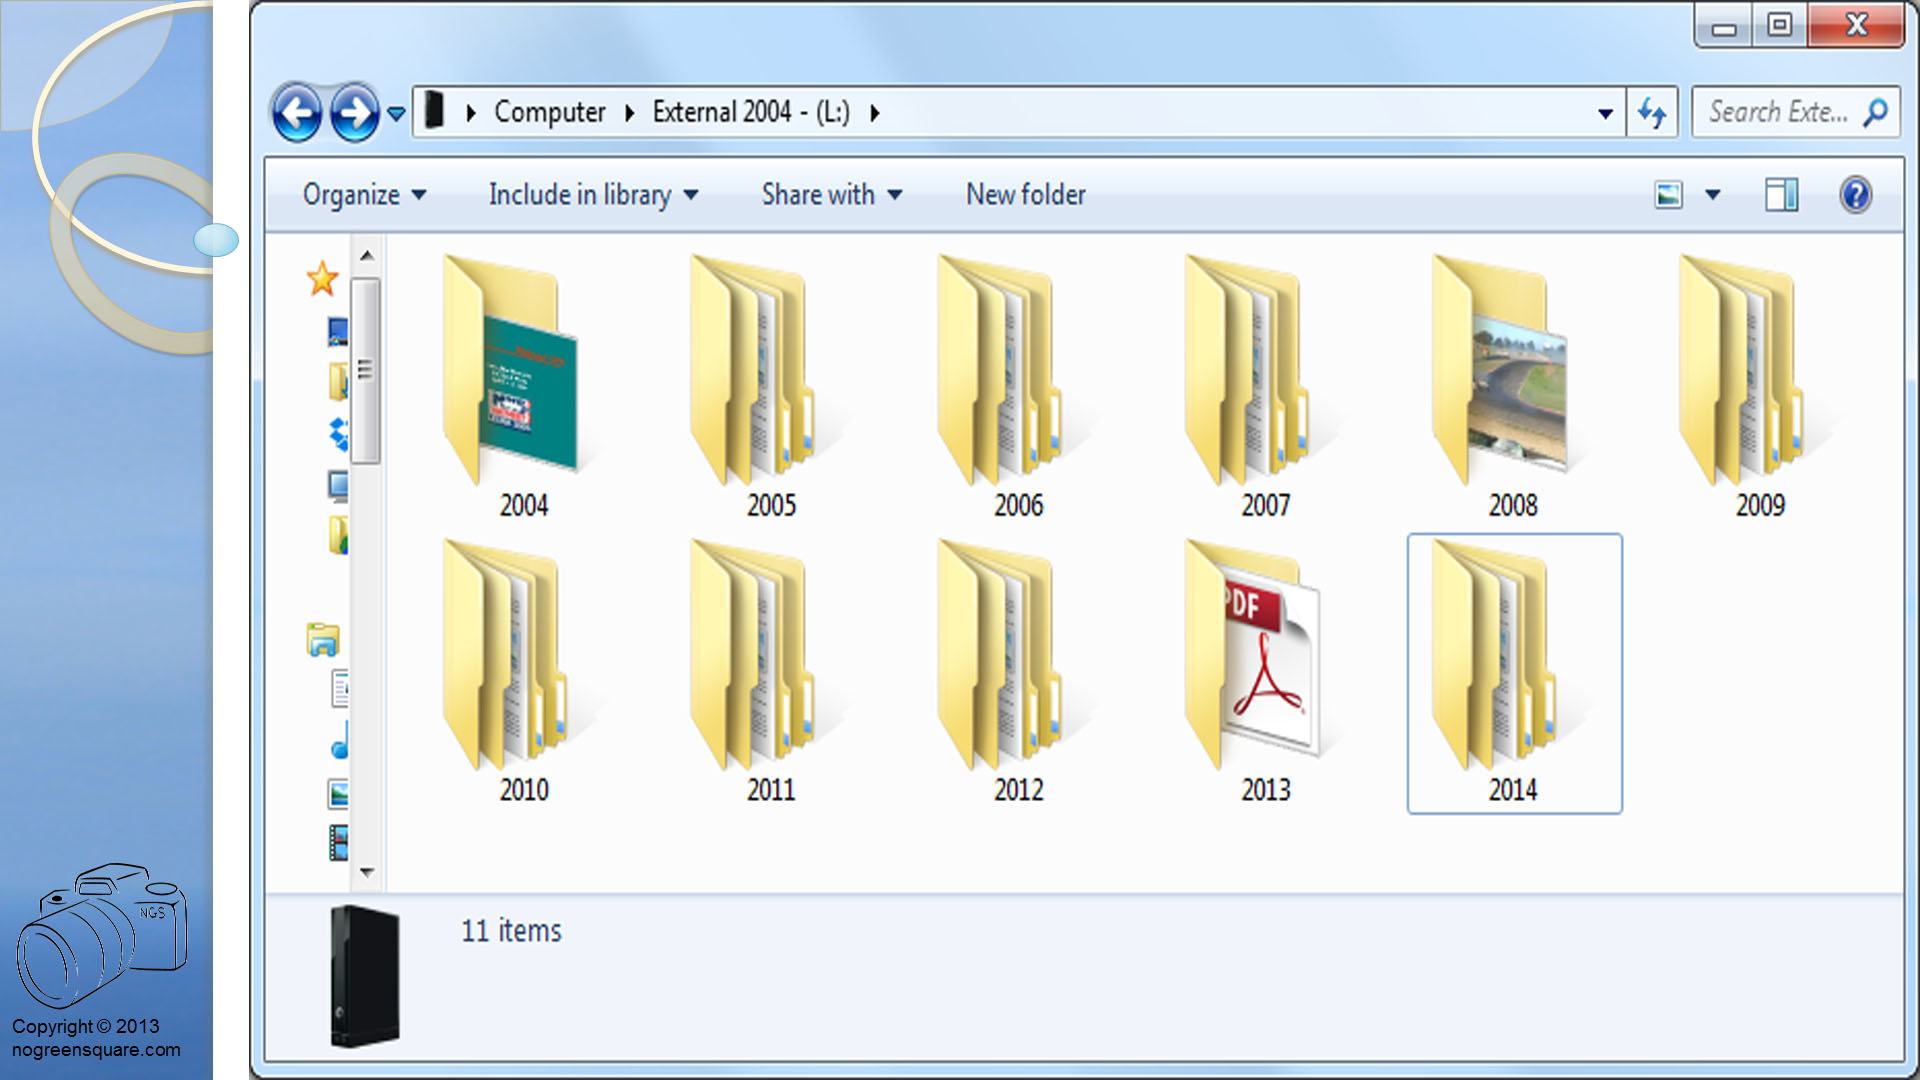
 This is my external drive structure. Each folder contains backups. My backups are manual and I usually backup after a major event or shoot.
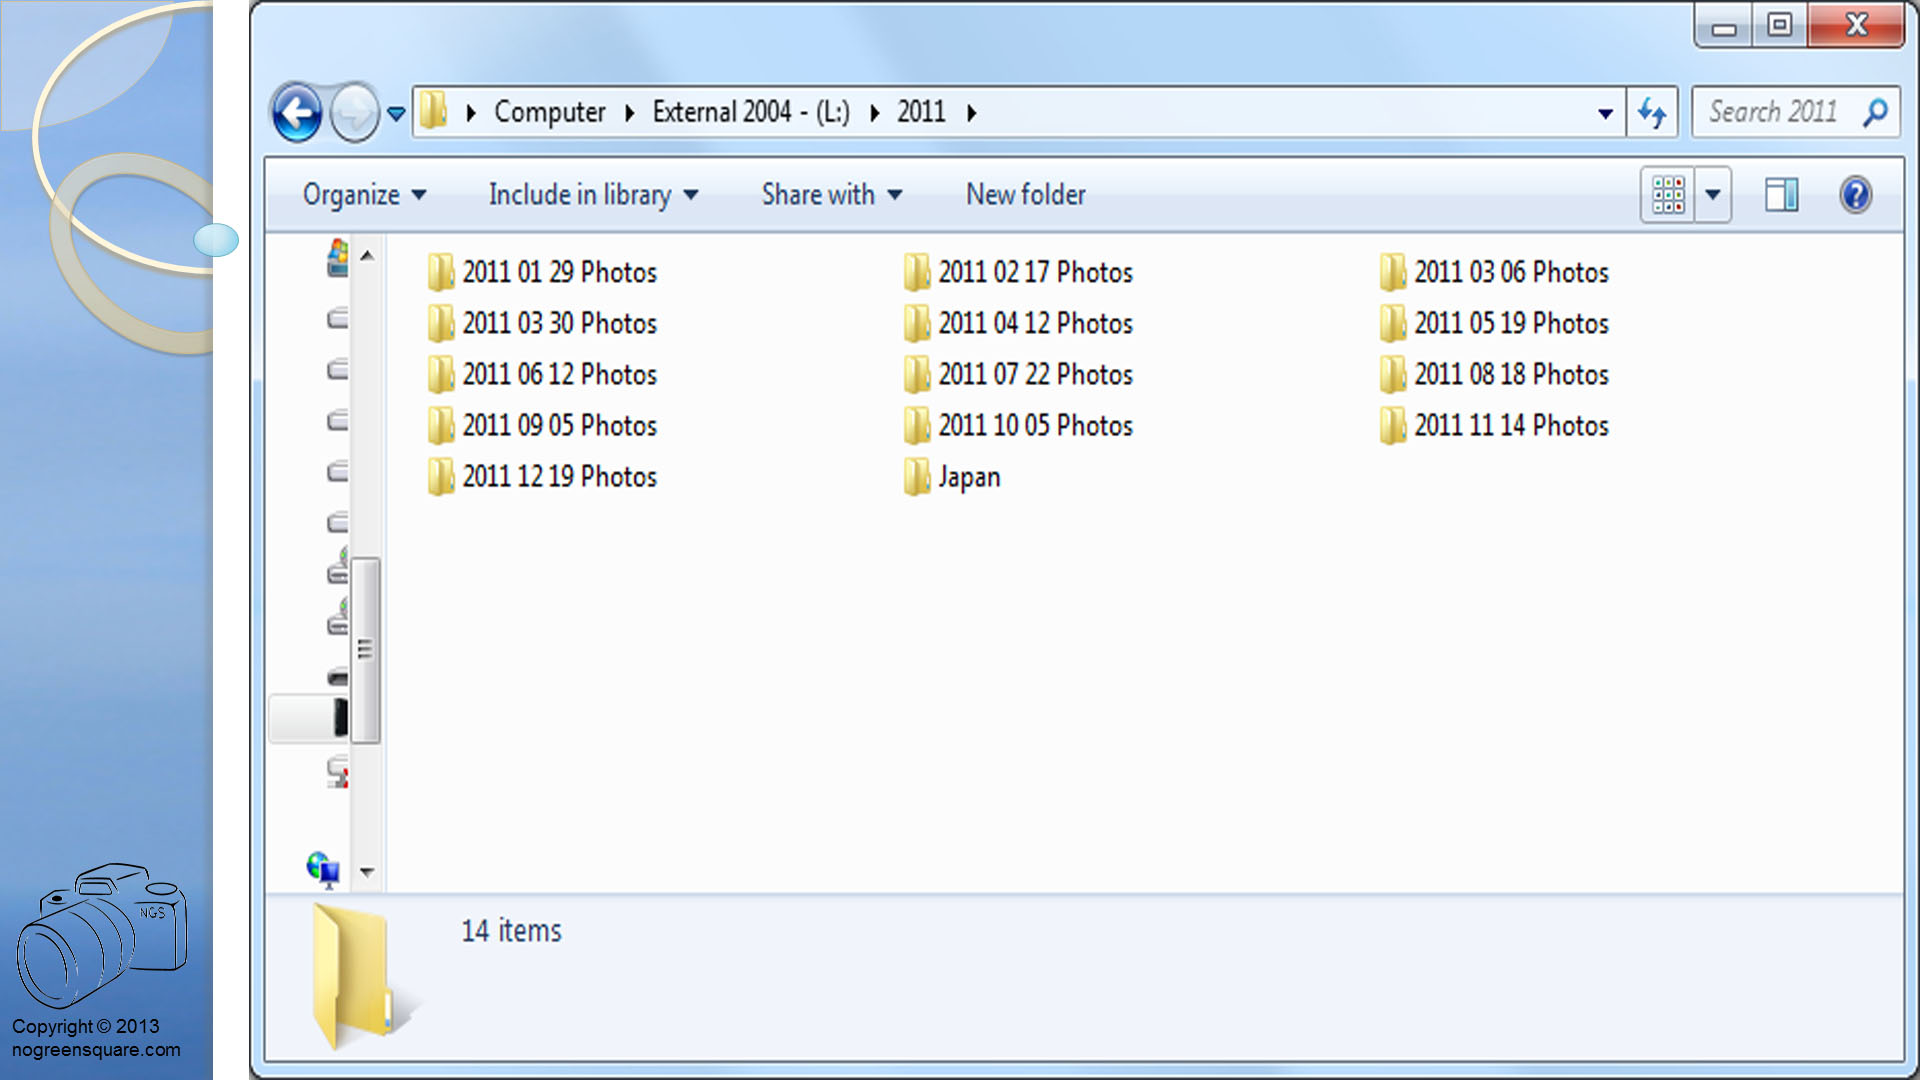
 This is what the 2011 folder looks like. Each folder is named as per the day I did the backup.
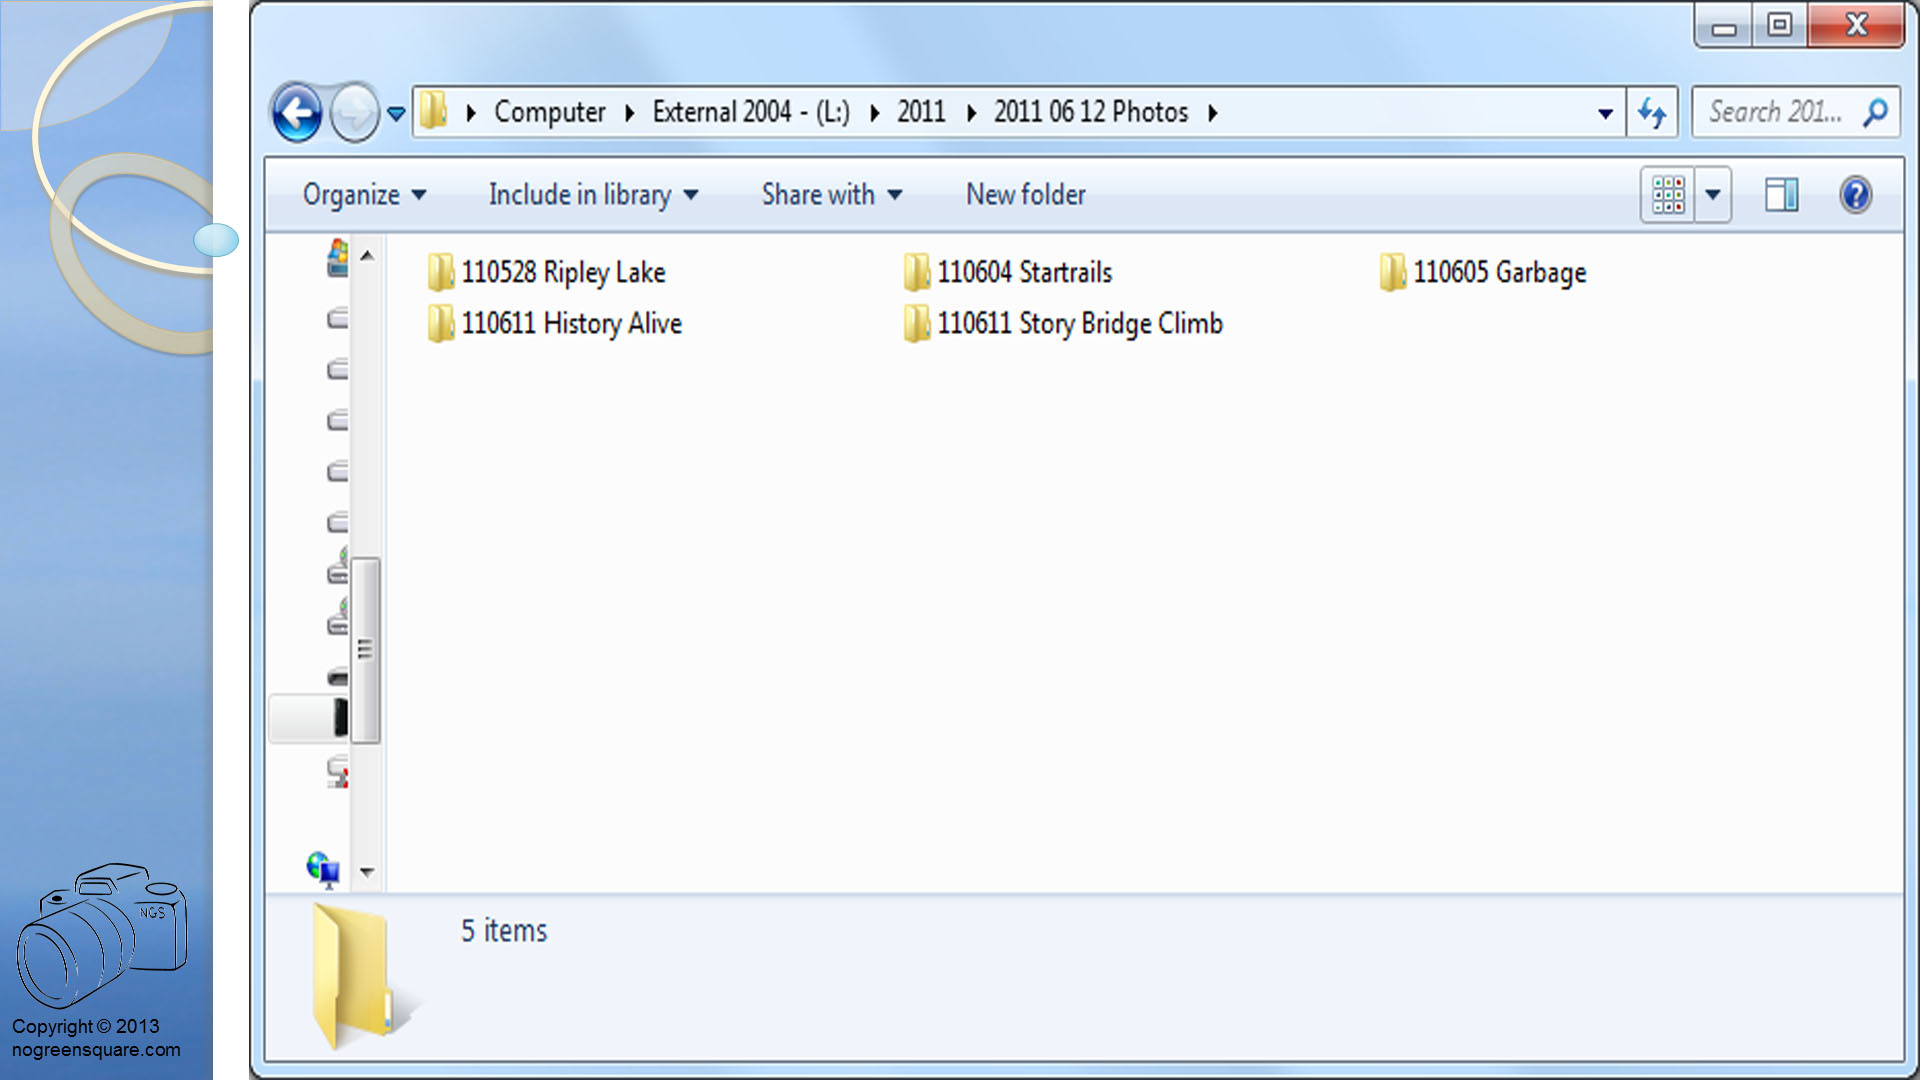
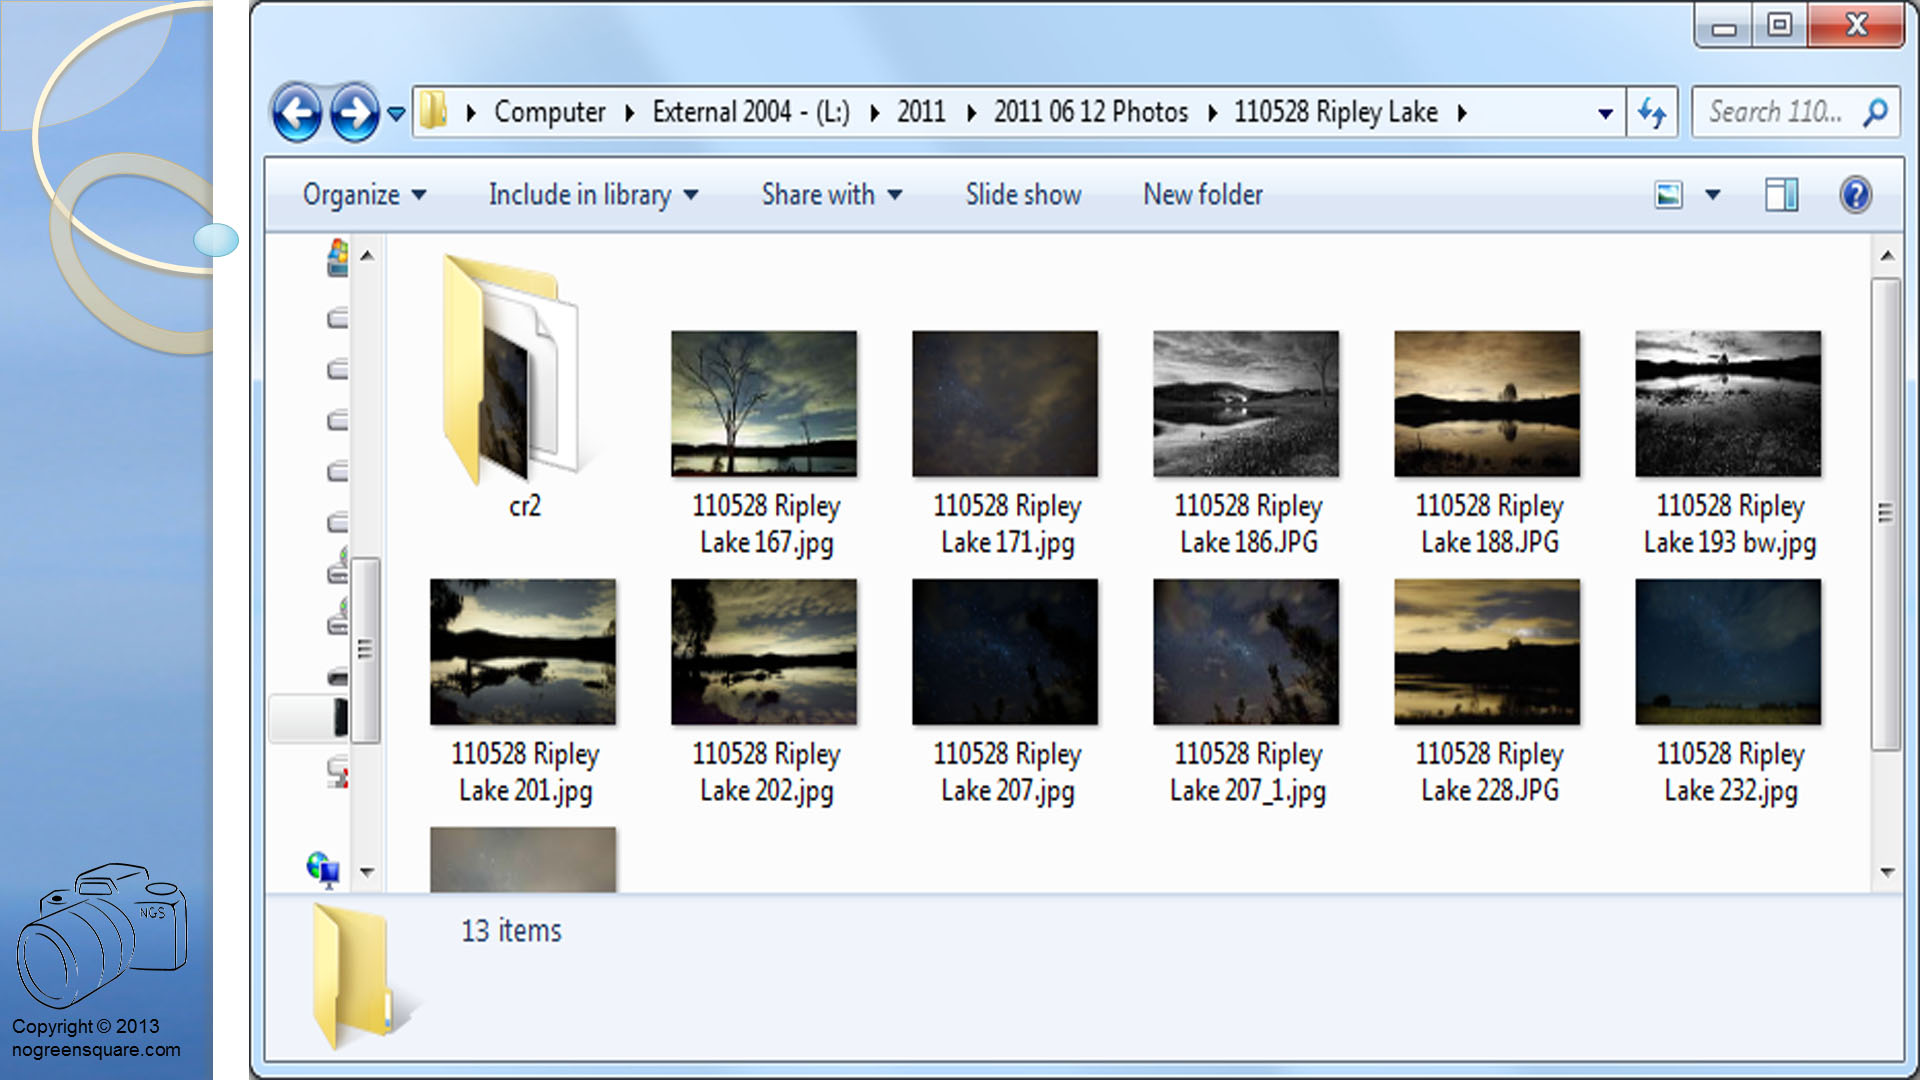
 If I open the 110528 Ripley Lake folder I will find the following jpgs each with the same file naming convention. And the RAW files are in the CR2 folder.


 Sunset over Mount Fuji from the Shinjuku Government Tower, Japan
 Sunrise over Ankgor Wat, Cambodia
 Junks in Ha-Long Bay, Vietnam
 Lake Manchester on Fraser Island, Australia


