
What is it?
The usual problems with Crossfit and indoor gym photography, is the small amount of light in these places. Because of this, your camera if left in automatic mode, will slow the shutter speed down which will cause your pictures to blur.
The problem with this is that you don’t want your pictures to blur! So how do you get around this?
Below is a list of tips that you can do with any camera that has a P mode, most point and shoot cameras will allow you to set one aspect of the camera, and modify some of the settings to allow you to get better shots.
The first thing to do is consult your manual, and look up these three terms, if you don’t have your manual and are not sure what they are I have linked the terms to previous blog posts, so you can have a read.
ISO, Aperture and Shutter Speed.
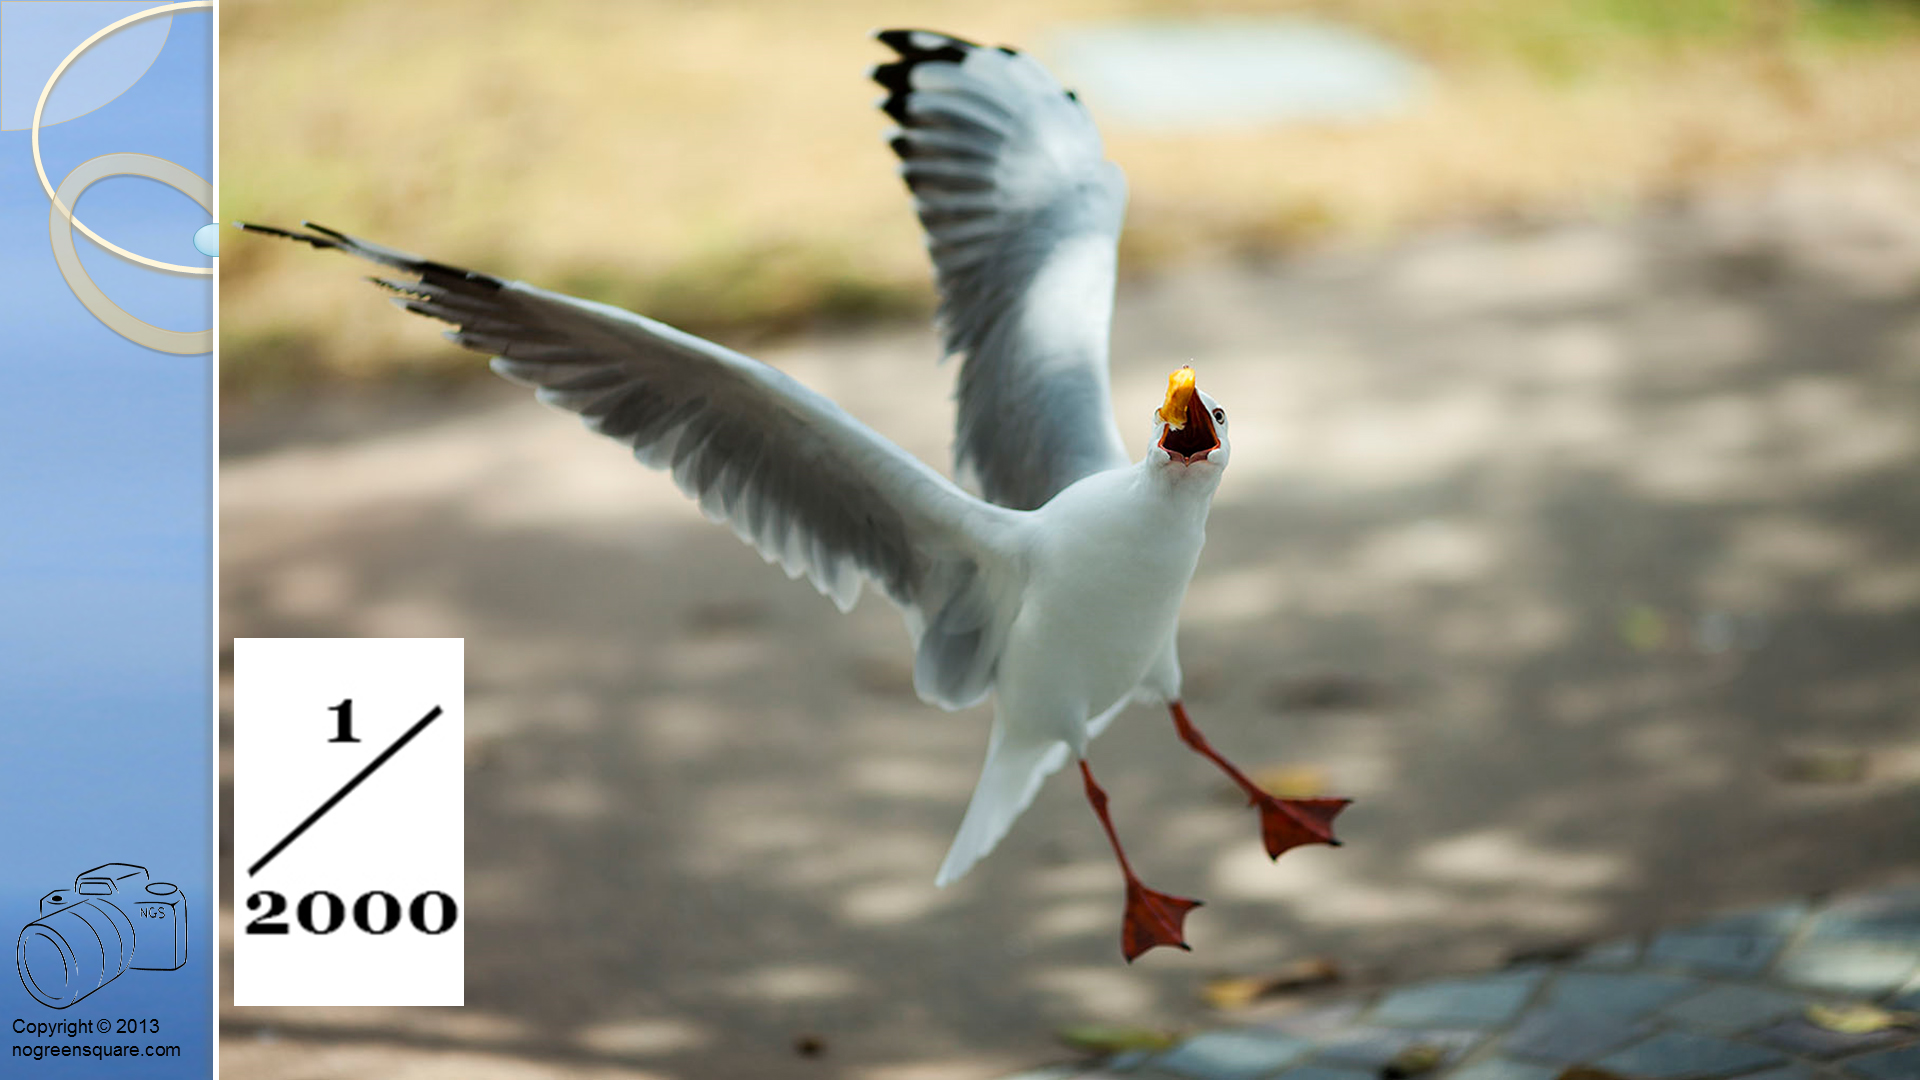
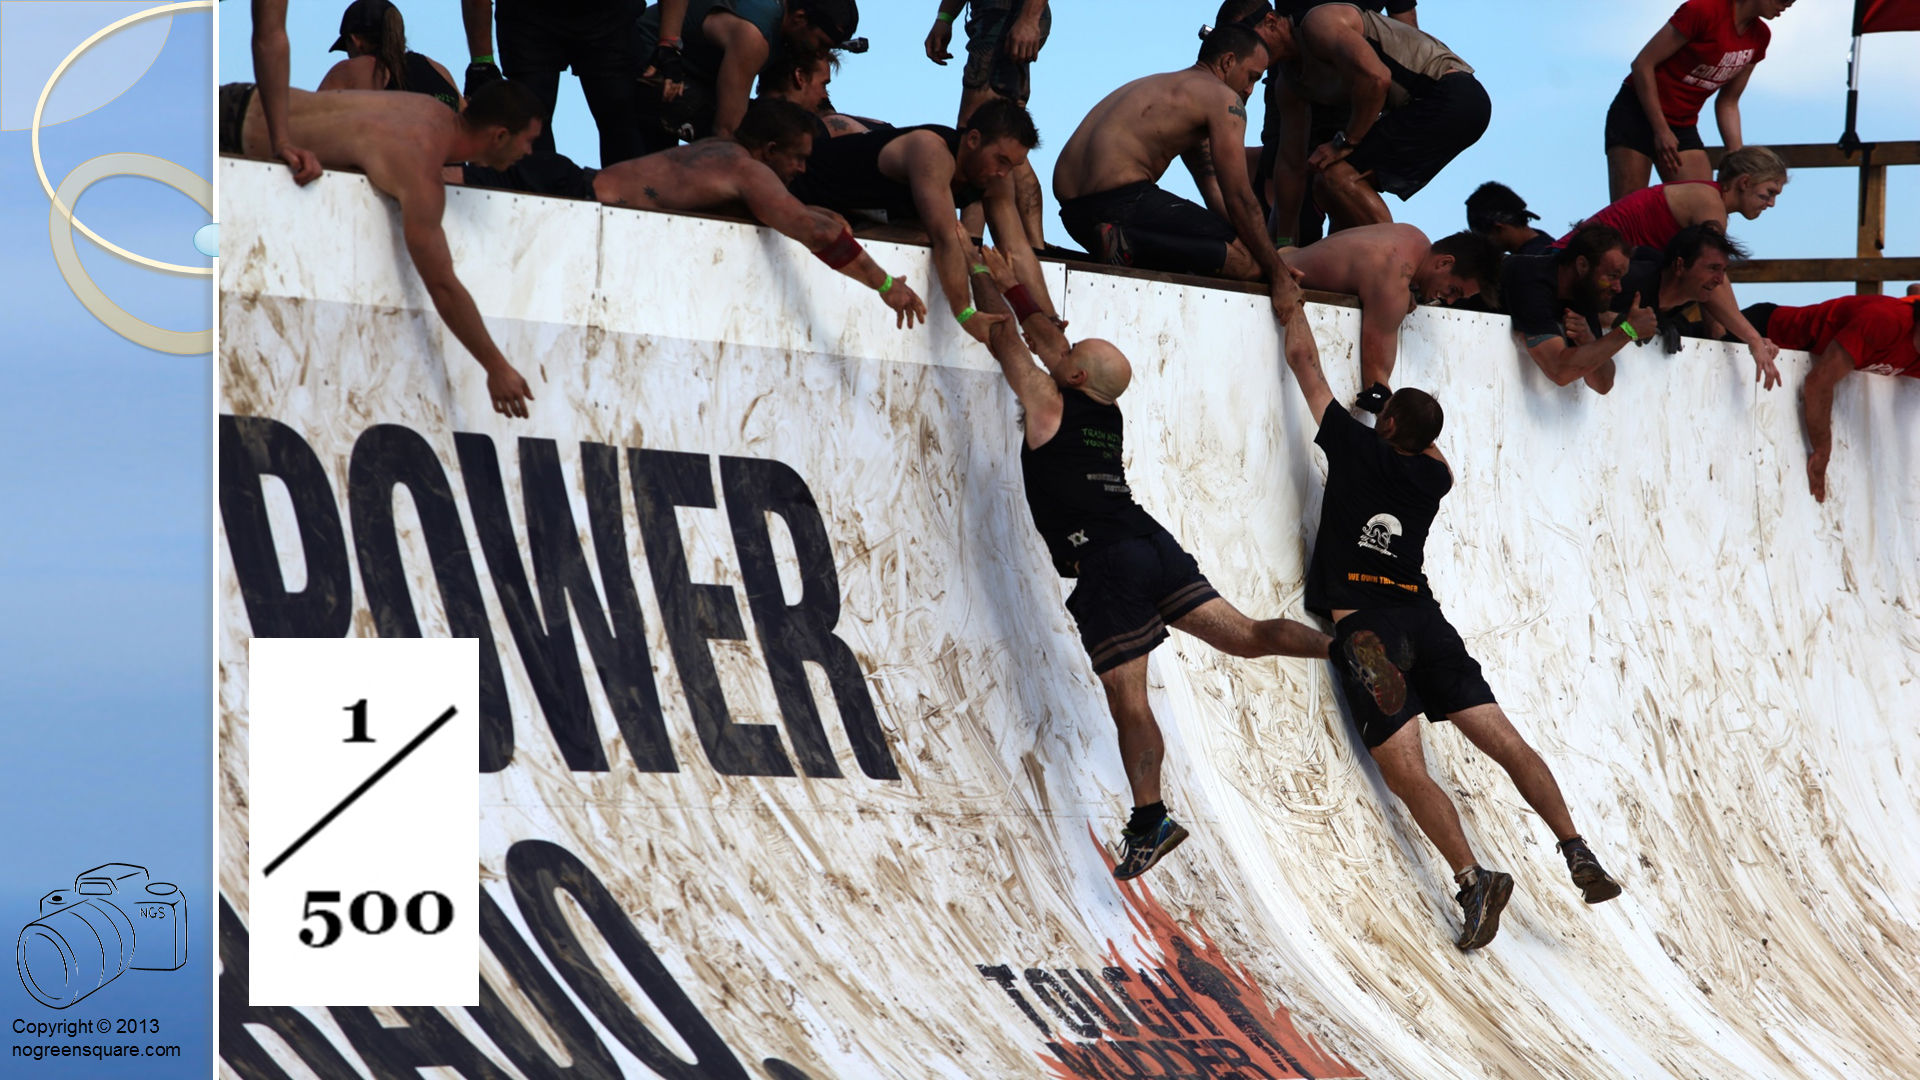
If you are taking pictures of people moving, you need a fast shutter speed to freeze the action. In these sorts of sports, you really need to be taking pictures at 1/250th of a second, as a minimum, anything slower than that and you will get motion blur.
Please note the following pictures were taken at Crossfit Coorparoo by me, using their Canon PowerShot ELPH 330 HS (pictured below), not my Canon 5D Mark II.

I set the camera in P mode, I adjusted the ISO manually to different ISO, here is the critical part, this camera when zoomed will have a larger number aperture, so it is at its best and will let in more light, when it is NOT zoomed, (don’t worry Trent, i set the camera back to how you had it when I gave it back)
Examples
So all the images below were taken with the camera not zoomed in, I used Foot Zoom, its where you walk closer or further away to get everything into the picture. With this in mind, have a look at some of the pictures below, I will explain what I have done to get these pictures and what is happening in the photos.
 In this photo taken at F3 ISO 1600 and 1/40th of a second, Mike’s legs are blurry as they are moving through his toes to bar exercise. This camera is being pushed to its limits though as ISO 1600 is very high and at F3 its at the smallest number it can be. So the light is terrible, and I can’t really do much about it.
So how do I make sure that I don’t get blurry shots?
TIMING! With Crossfit most of the movements have a point that they are locked out, or in a Rep. That’s when you take their picture. Please note the time between pushing the button and the camera taking the picture will depend with each camera, with a little practice you will get to know what it is.
 These two images were both taken at F3 ISO 400 and 1/20th of a second, the one on the left has better timing than the one on the right, as I have managed to get the ball when it has stopped, whereas on the right the ball is still moving up or down. The two bodies are relatively stationary as they are in the top of their rep. An open door helped with the light at this end of the gym. Please note: I have very steady hands, taking a picture at 1/20th of a second may not give you the same results, its best to try and get the camera to use a faster shutter speed.
 These two images were both taken at F3 ISO 1600 and 1/60th of a second, the one on the left has better timing than the one on the right, as I have managed to get the kettle bell when it has stopped, whereas on the right the ball is still moving up or down. The two bodies are relatively stationary as they are in the top of their rep. The open door in the background has really affected this photo, best to avoid bright spots like this with these point and shoot cameras that cannot be set manually.
 In this photo shot at F3 ISO 400 and 1/60th of a second, I used the on camera flash to light up the subject, again the timing was key as Trent is at the top of his movement, note the flash on these point and shoot cameras is so small it will only usually have a range of about a meter. You can see how the light on his shoes is already not affected by the flash, usually best not to use flash.
 In this photo shot at F3 ISO 320 and 1/60th of a second, again I have used the flash, you can see signs around Mike’s shoes where they have moved after the flash has fired, and there is blur.
So here are the tips summed up.
If your point and shoot camera has a zoom lens, don’t zoom, if you have an entry level DSLR and it has the kit lens on it, best not to zoom as well.
If you have a P mode in the menu (instead of “sports” “landscape” or “portrait”) use it, it will allow you to change some of the settings. Specifically the ISO.
Turn the flash off, usually it kills the battery quicker, slows down the reaction time of the camera, and it wont get too far.
If possible set the shutter speed as fast as you can.
Timing, timing, timing, test how long the response is between you pressing the button and the camera taking a picture, and hit the button at the right time.
If your camera has a burst mode which takes a series of photos very quickly, use it and start the burst as the movement is about to finish, one of the photos may be timed perfectly.
This was written specifically for point and shoot cameras, if you have a DSLR, then you should use shutter priority and lift the ISO as high as you need to, so that you can set the shutter speed to 1/250th. There are very cheap 50mm lenses (under $200) for most DSLR cameras with an Aperture of 1.8. they would be really well suited to this type of photography.
If you are a Crossfit Affiliate and would like me to show you how to take better photos with your own cameras in your gym, please contact me. If you would like to see some of my work, have a look through this gallery, taken at the Again Faster Semper Paratus 2014 Team Challenge. Most of these pictures were taken at F2.8 ISO 1600 and 1/90th of a second.
 50mm with 12 mm tube: The photo on the left is the 50mm at standard focusing distance. The photo on the right is using the tube. Note the depth of field or out of focus in the background is starting to disappear very quickly.
 50mm with 24mm tube: Note the out of focus is much more effective, and that the EF-S marking on the top of the lens is almost not readable.
 50mm with 36mm tube: I now am so close that the EF-S marking is not in my picture. Note though that now the 60mm is starting to be out of focus. You can see the details in the gold ring and the rubber on the lens though quite nicely.
 50mm with all three tubes: Note that with all three on the camera, I had to increase the exposure. Note the .8 of the 2.8 is now almost out of focus. The depth of field at this distance would be less than a millimetre.
 100mm Macro: The photo on the left is the 100mm at standard focusing distance. The photo on the right is what the Macro lens can do without the use of an extension tube. This lens also has
  I have added the 12mm tube to the 100mm dedicated macro lens to show that if you were to buy the tubes you can then still use them on your dedicated macro as well, and get even closer!
 Picture 1
 Picture 2
 Picture 3
 Picture 4
 Picture 5
 Canon 5D II, ISO100 1/40th 16mm F11: By panning I have been able to make this little boy look like he was going faster than he was.
 Canon 5D II, ISO100 1/125th 40mm F6.7: By panning I have made this look like the motorbike was going faster than it actually was, but keeping the subject, the passenger on the back as sharp as possible.
 Canon 5D II, ISO400 1/60th 65mm F5.6: In the rain there is usually less light. Panning has still allowed me to capture the action without blurring the subject.
 Canon 5D II, ISO1600 1/125th 21mm F3.2: By panning I have been able to almost freeze the car in mid-air, but still been able to show that it is moving, all in a very poorly lit environment.
 Canon 20D, ISO800 1/40th 40mm F3.5: The upper limit on the 20D was really ISO400. This ISO800 image is very grainy, but by panning I was able to take this image just before dawn at a 24 Hour race. The darkness allows the viewer to see the glowing brakes better.
 Canon 40D, ISO100 1/80th 135mm F7.1: By panning with the car I have been able to keep the car sharp while it was driving past me at about 120km/h. By using a large number F there is enough depth for the driver to be sharp as well.
 Canon 7D, ISO1600 1/60th 105mm F4: By panning at such a slow shutter speed I have removed the distracting crowd in the background of this shot, and the focus remains on the driver and his bike.
 Canon 5D II, ISO50 1/60th 70mm F14: The timing tower and the white building at Lakeside are quite an eyesore. By panning and blurring the background, the car (the subject of this photo) is more prominent.
 Canon 5D II, ISO400 1/180th 50mm F6.7: This shot was taken from a moving train in Intelaken, Switzerland. I wanted a slow shutter speed so the waterfall wouldn’t look frozen, by panning I have allowed the shot not to blur.
 Canon 7D, ISO100 1/80th 16mm F9: The blurry brown in the foreground is tall grass. As the sun was behind me, this was “the best angle” from which to capture this car. However the grass in the foreground was in the way. I couldn’t move the grass, so I had to use a slow shutter speed to blur it out of the photo.
 Top Left, Canon 5D II, ISO400 1/125th 70mm F8, Bottom Right, Canon 5D II, ISO100 1/125th 150mm F3.5: The fence in the top left picture is starting to disappear with some panning at 1/125th. By getting closer to the fence, using a longer length lens and a smaller aperture, the fence in the bottom right almost looks to have disappeared.
 Boat on Brienzsee, Ringgenberg; using a wide angle lens gives the mountain’s behind the boat some perspective.
 Flying Scotsman, Paris; the
  Pimlico Tube Station, London; by taking this photo at 1/8th of a second, the train moving out of the station has been accentuated. By using the right balance of
  Boats for hire, Lake Como; by using a tripod and a long
  Flower bokeh, Rothenburg; by using a very small number
  Spiral staircase, Arc de Triomphe; by using a fisheye lens, the spiral of the staircase has been exaggerated.
 Dole Reflections, Dole, France; by using a
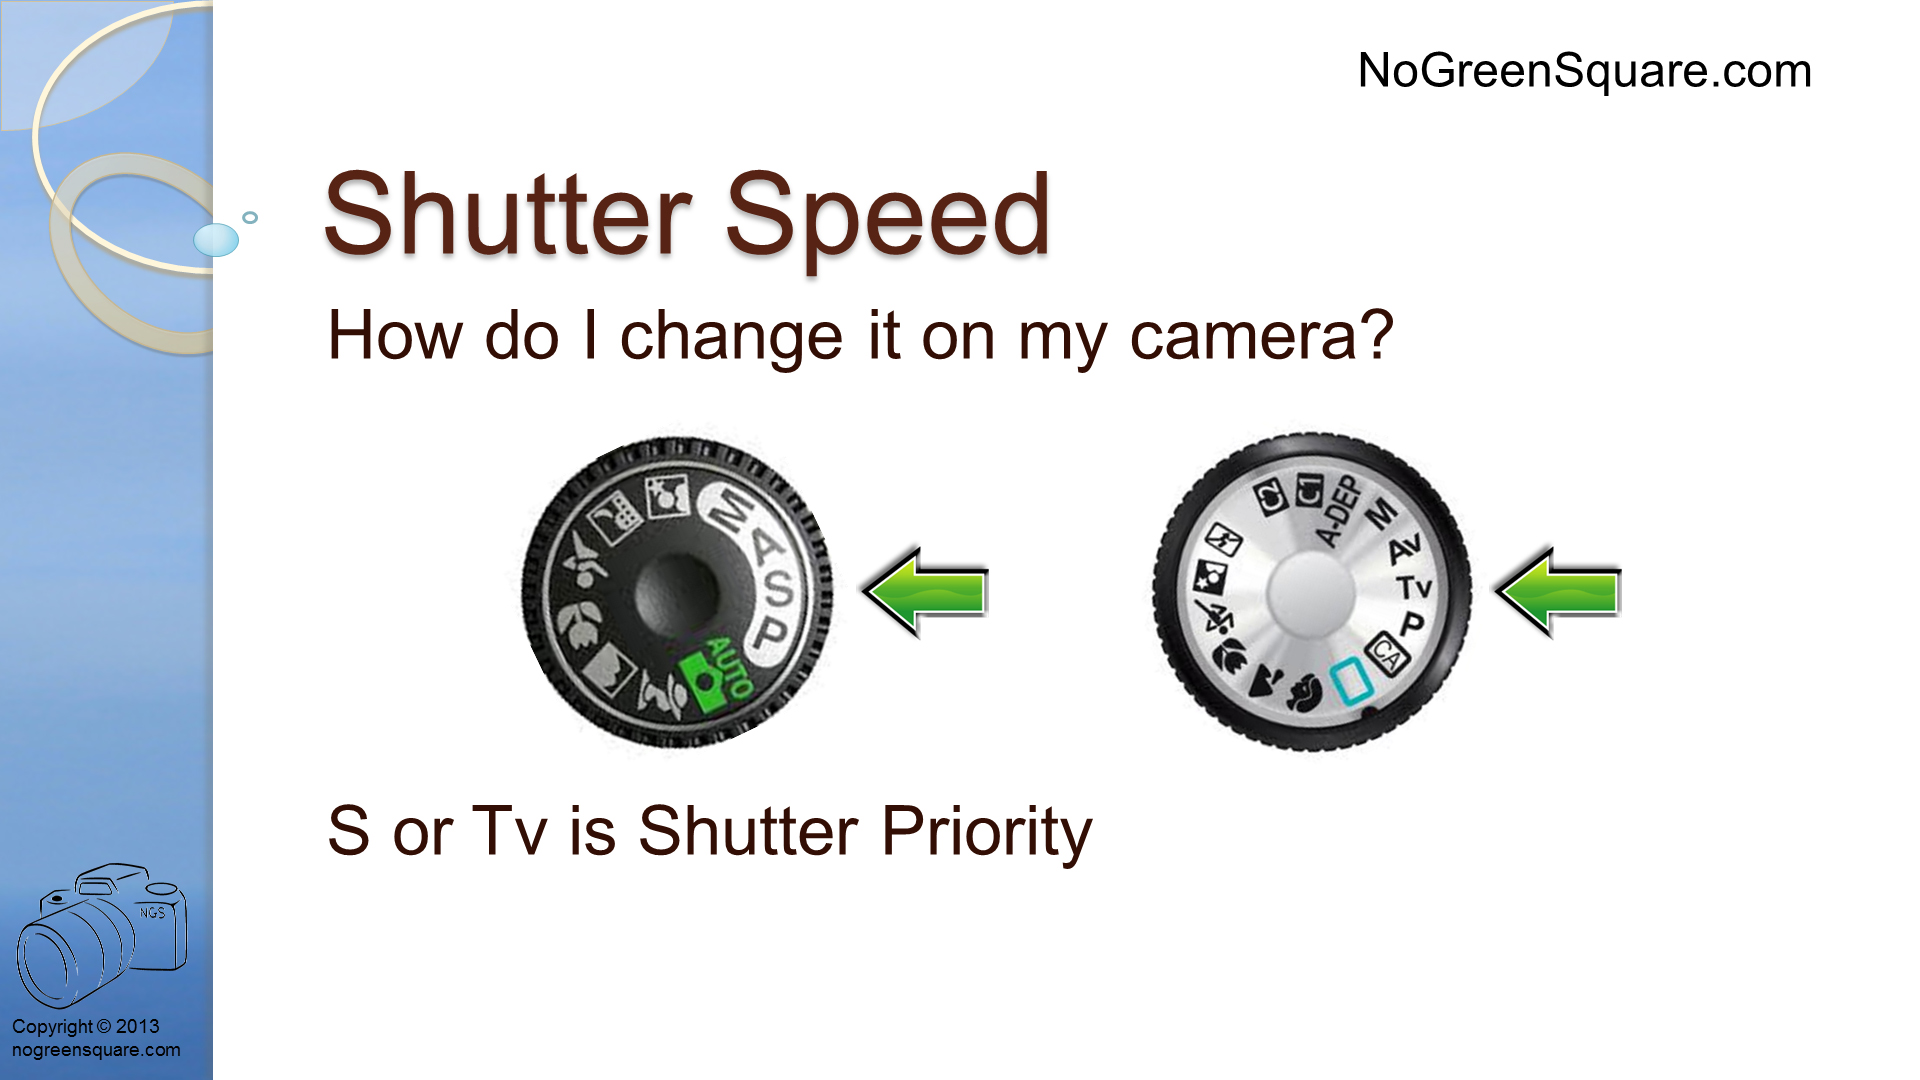


 Slow Shutter: the cars are so blurred they are not visible. All you can see is their headlights / tail lights.