
What is panning?
Panning is a photography skill that involves moving the camera left to right or up and down to follow your subject while they are moving. You can also slow the shutter speed down in order to blur the background as you take the picture.
This blog post will show you two of the ways it can be used. There will be a follow up post showing another two uses and some exercises on how to improve your panning skills.
Usually this skill is used in sports photography with very fast moving subjects but it has many more uses.
I feel that panning is a great skill to learn, as not everything you will photograph will stay still. Sometimes you are moving and the subject is stationary, so you need to pan with it. An example would be taking a picture from a fast moving train.
How do I use it on my camera?
There is not one setting that makes panning what it is. It is a mixture of movements and shutter speed that will get the result you want. Image stabilisation can be helpful but was not used in any of the examples below. This post walks through a few different examples of panning, showing the settings and how to get similar results.
What does it do to my pictures?
Blurring the background, while keeping the subject sharp
This is typically the look that people want from panning. Blurring the background and keeping the subject sharp draws attention to the subject and takes the focus away from the background. This could be useful where the background is distracting or muddled with colours.
 Canon 40D, ISO100 1/80th 135mm F7.1: By panning with the car I have been able to keep the car sharp while it was driving past me at about 120km/h. By using a large number F there is enough depth for the driver to be sharp as well.
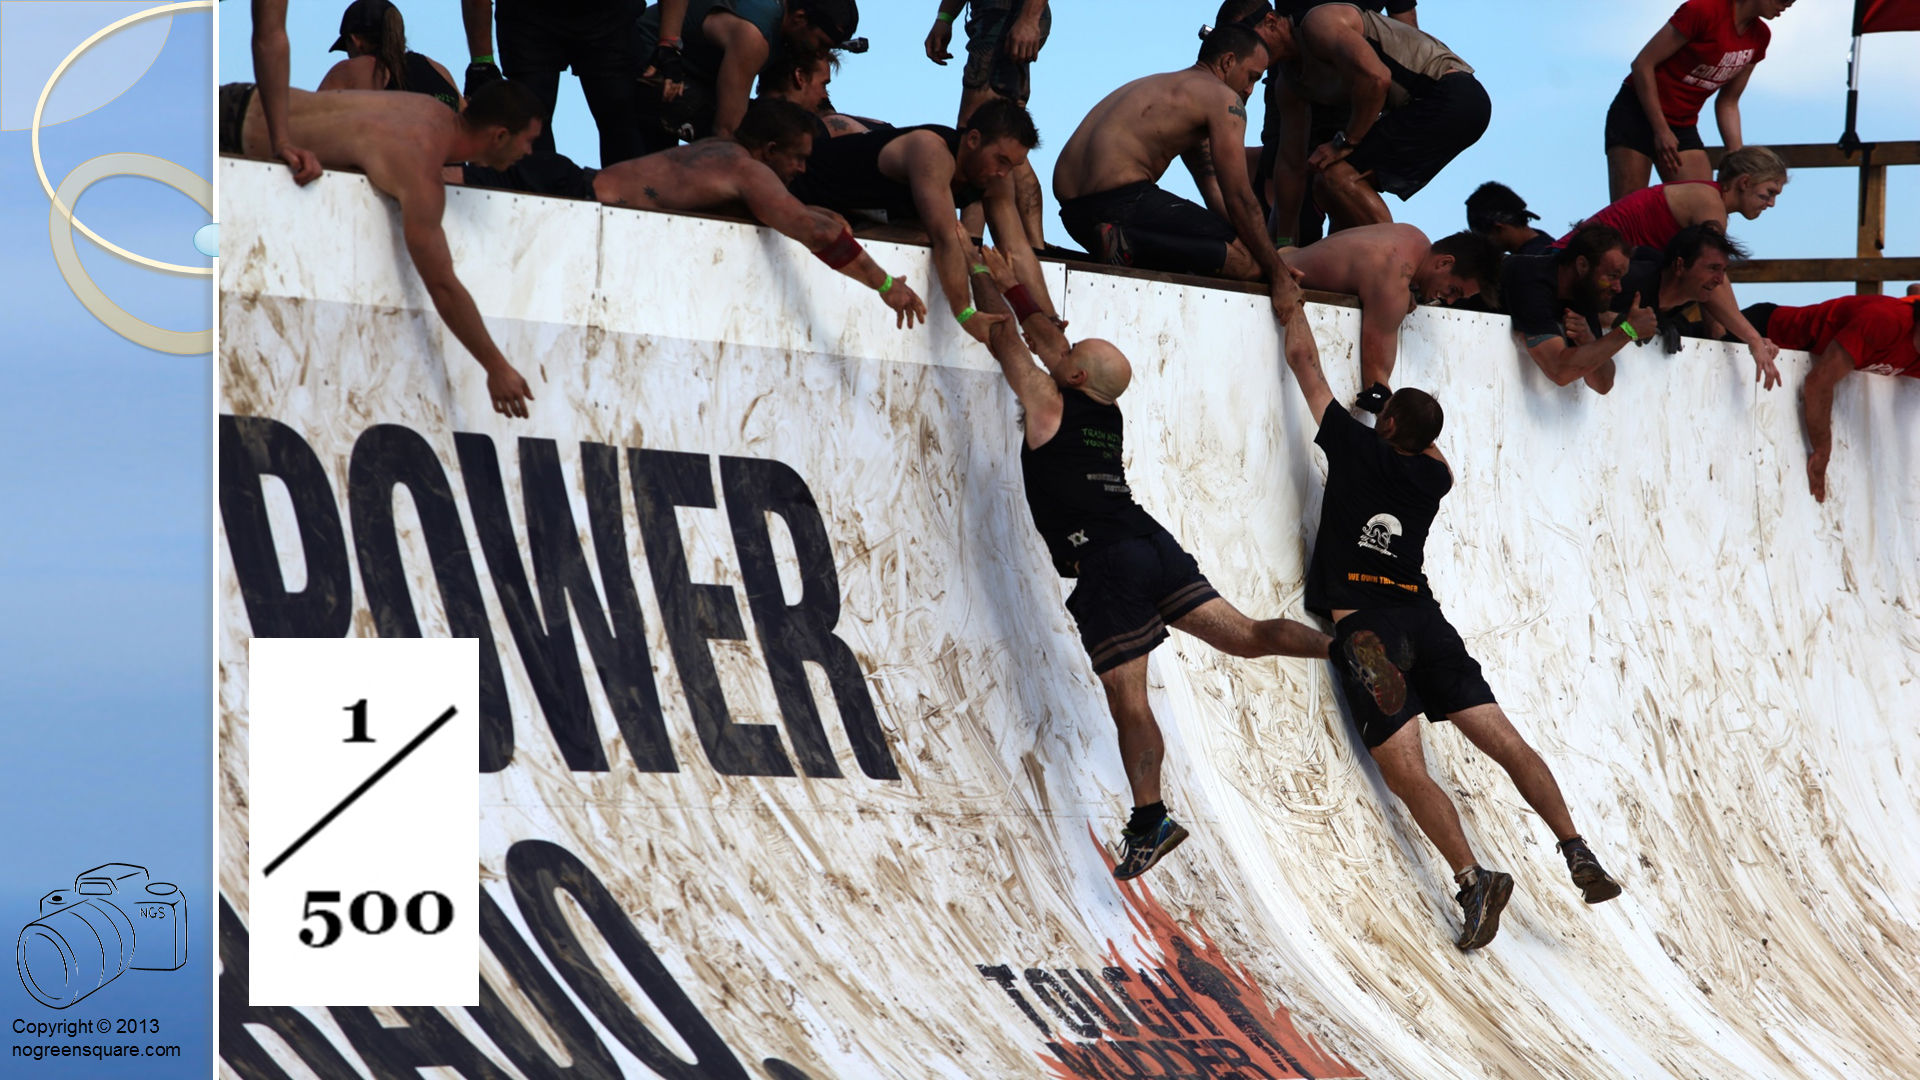
 Canon 7D, ISO1600 1/60th 105mm F4: By panning at such a slow shutter speed I have removed the distracting crowd in the background of this shot, and the focus remains on the driver and his bike.
 Canon 5D II, ISO50 1/60th 70mm F14: The timing tower and the white building at Lakeside are quite an eyesore. By panning and blurring the background, the car (the subject of this photo) is more prominent.
Keeping the subject sharp while you are moving
An example of this is taking a picture from a moving train. Say you wanted to get a picture of a landscape while you were passing it from a moving train. You want a reasonable depth of field, using a large number aperture, this will of course slow the shutter speed down. By panning with your subject you will be able to get a sharper shot than trying to keep the camera still.
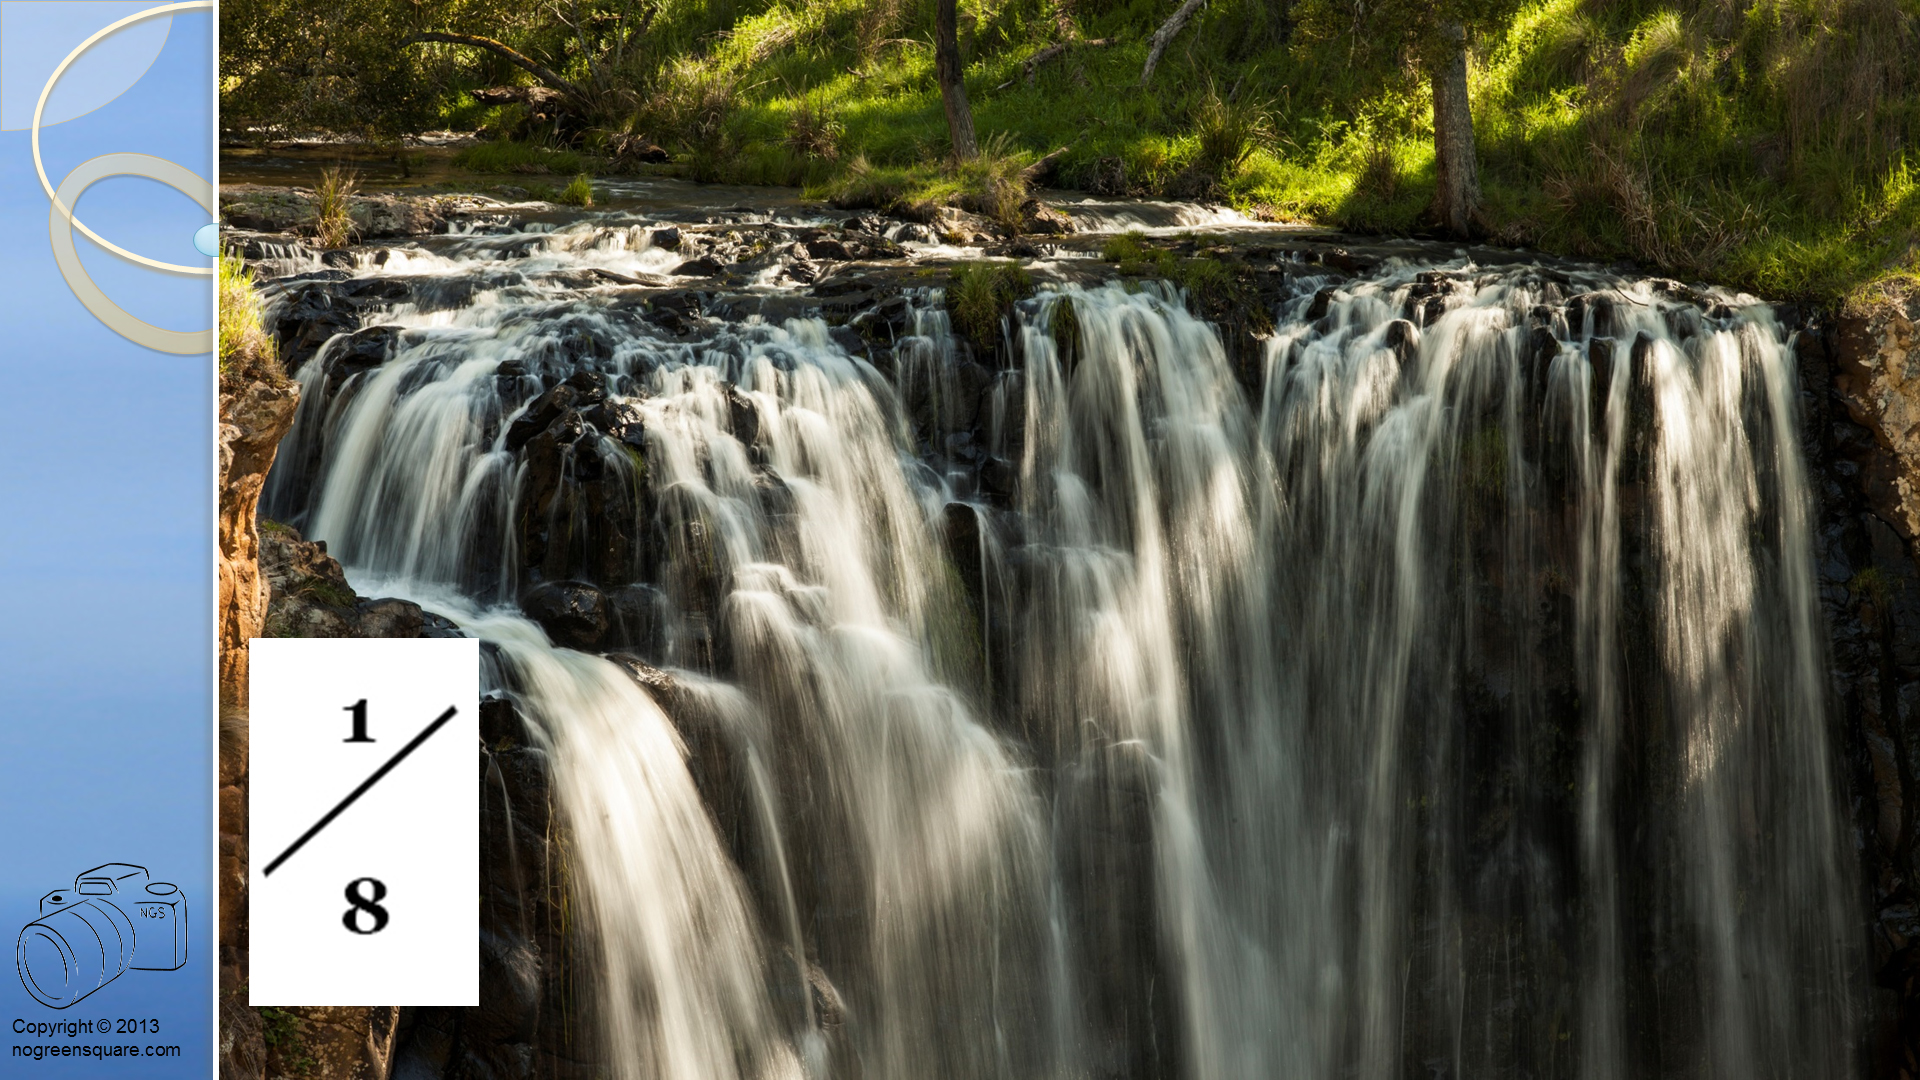
 Canon 5D II, ISO400 1/180th 50mm F6.7: This shot was taken from a moving train in Intelaken, Switzerland. I wanted a slow shutter speed so the waterfall wouldn’t look frozen, by panning I have allowed the shot not to blur.
Blurring the foreground to remove it from the picture
This is not usually seen in the everyday world of a photographer, but motorsport photographers have to deal with photographing through fences, crowds of people or many other objects to get the shot. Sometimes you can use a small number aperture to get the fence out of focus, but you can also do it by panning. By slowing the shutter speed down you can actually blur out the fence.
 Canon 7D, ISO100 1/80th 16mm F9: The blurry brown in the foreground is tall grass. As the sun was behind me, this was “the best angle” from which to capture this car. However the grass in the foreground was in the way. I couldn’t move the grass, so I had to use a slow shutter speed to blur it out of the photo.
 Top Left, Canon 5D II, ISO400 1/125th 70mm F8, Bottom Right, Canon 5D II, ISO100 1/125th 150mm F3.5: The fence in the top left picture is starting to disappear with some panning at 1/125th. By getting closer to the fence, using a longer length lens and a smaller aperture, the fence in the bottom right almost looks to have disappeared.
To Be Continued
 Boat on Brienzsee, Ringgenberg; using a wide angle lens gives the mountain’s behind the boat some perspective.
 Flying Scotsman, Paris; the
  Pimlico Tube Station, London; by taking this photo at 1/8th of a second, the train moving out of the station has been accentuated. By using the right balance of
  Boats for hire, Lake Como; by using a tripod and a long
  Flower bokeh, Rothenburg; by using a very small number
  Spiral staircase, Arc de Triomphe; by using a fisheye lens, the spiral of the staircase has been exaggerated.
 Dole Reflections, Dole, France; by using a
  Shibuya Crossing, Japan; 9 shots. Taken on a Canon EOS 7D at 10mm. If you look carefully, the taxi and white car appear twice as they were moving through the scene as I was taking the images.
 The Milky Way, 11 shots. Taken on a Canon EOS 5D Mark II, and at 18mm the left and right of the photo are opposite horizons.
 Moffat Beach, Australia; 41 shots. The exposure was set for the middle and right of the image and the sun has slightly blown out (created the very bright white areas) on the left.
 Brighton Jetty Classic 2010, Australia; 9 shots taken from a helicopter as it flew left to right.
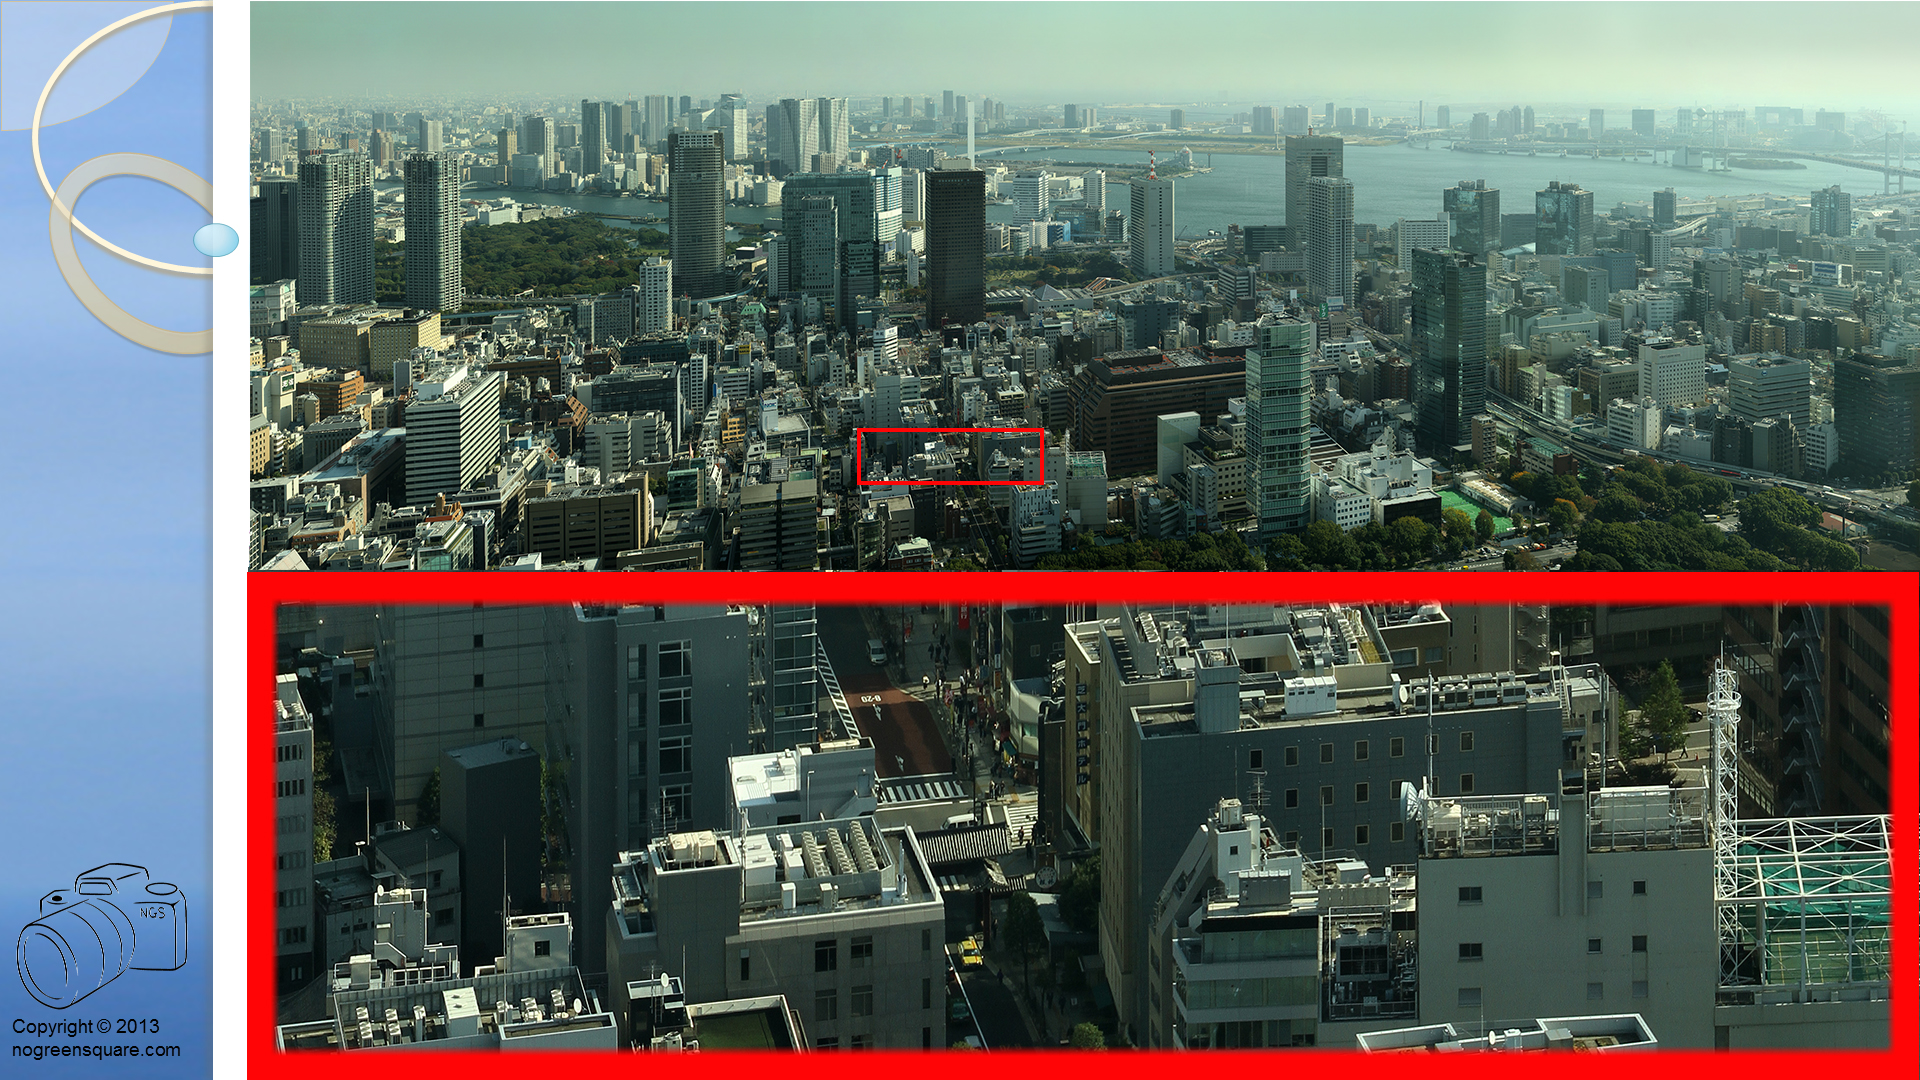
 Tokyo, Japan; 83 shots 3 rows high and 27 shots wide. Taken from the Tokyo Tower, the section in the large red rectangle is a crop of the small section in red on the main picture. This image could be printed 3m tall and would be about 27m long.
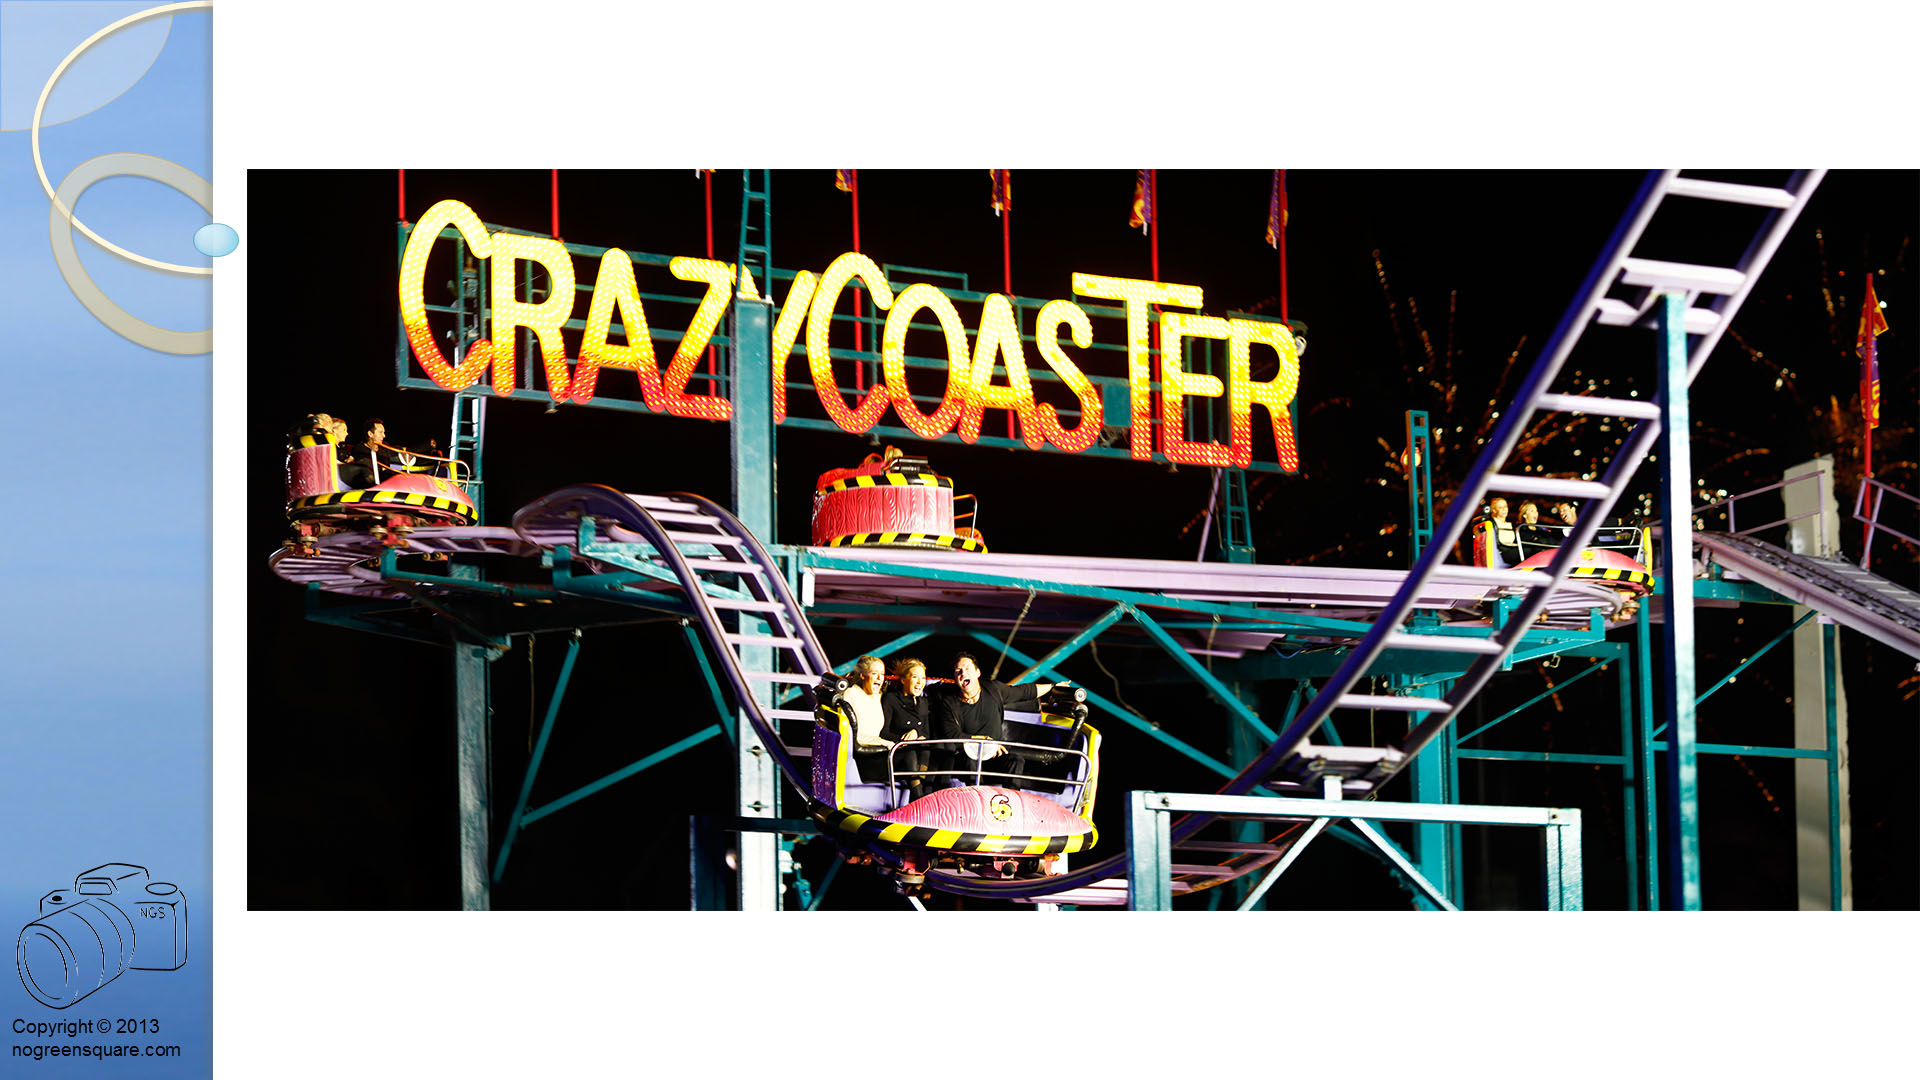
 Crazy Coaster, Brisbane Ekka 2012; These images were never shot to be a panorama, but I saw the opportunity to see if they would work, and it did. If you look carefully, the riders are the same in each car. So dont be scared to give something a go!
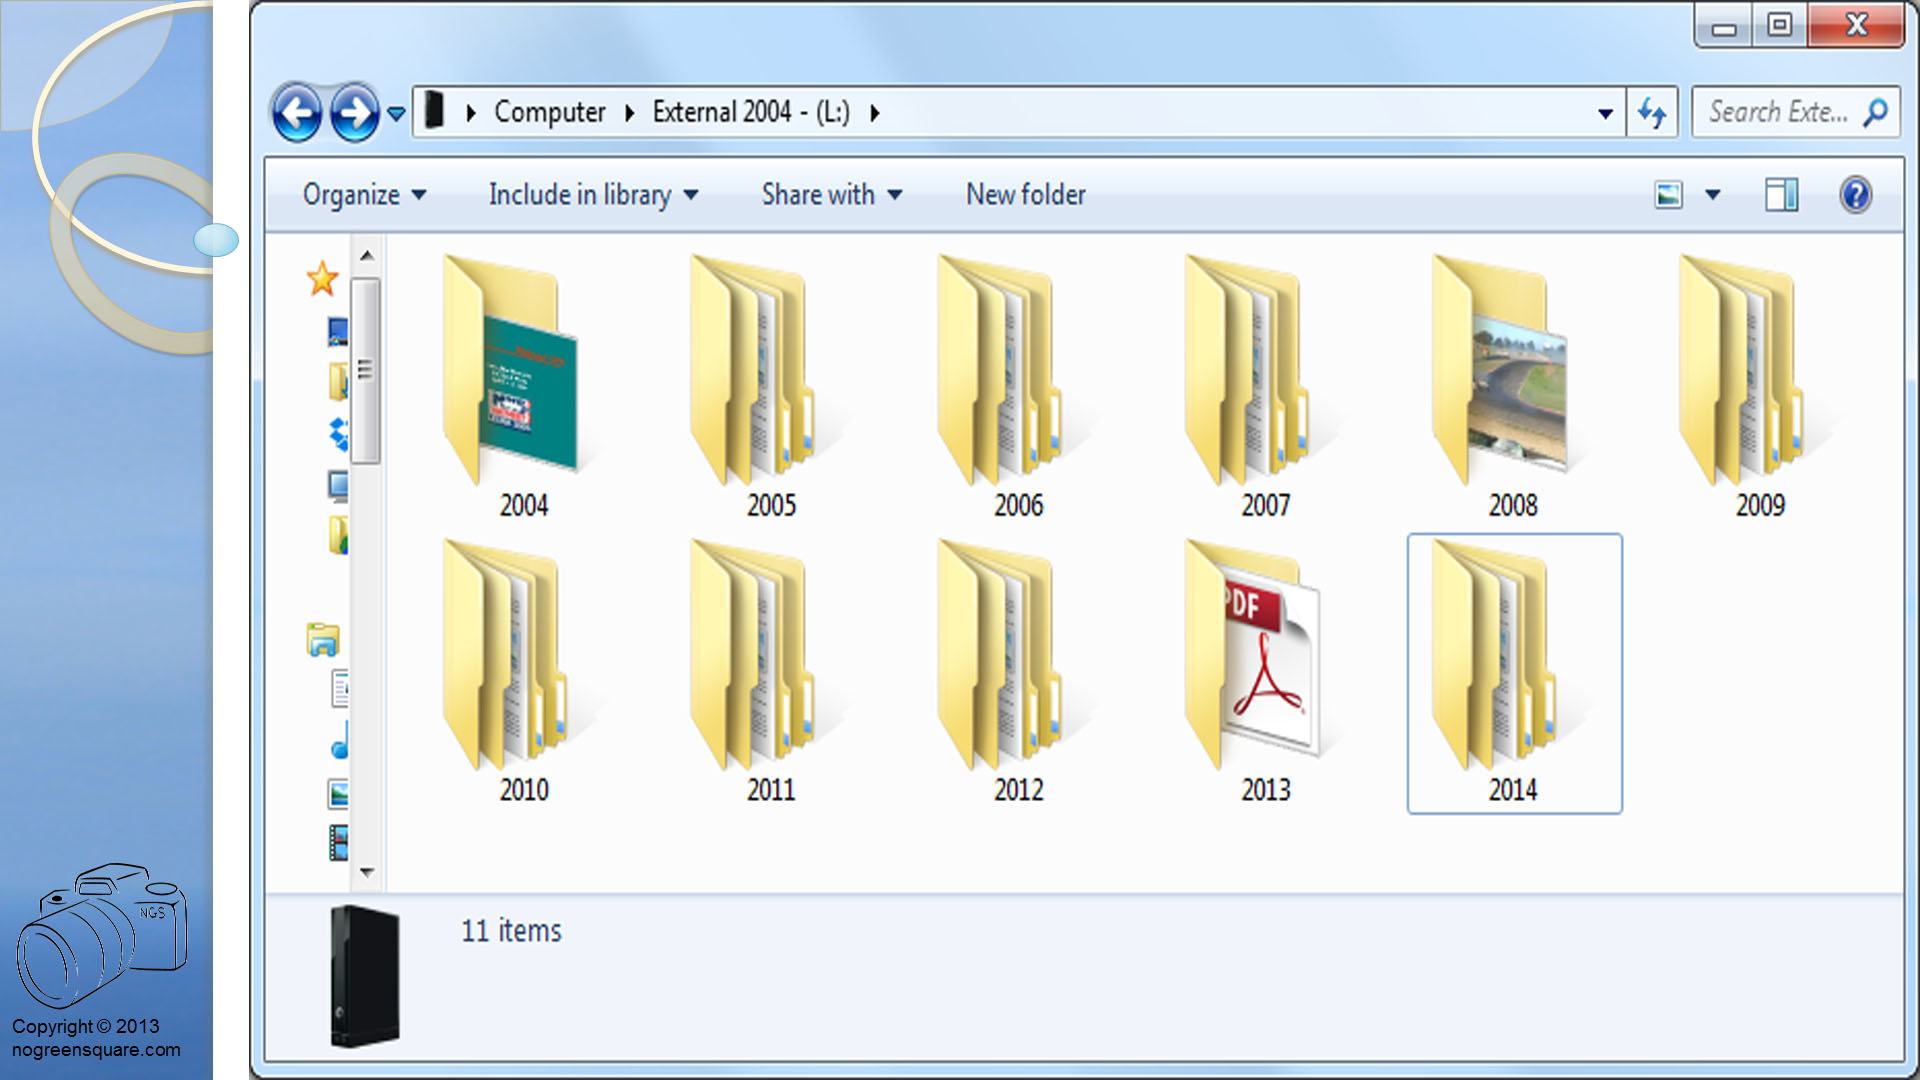
 This is my external drive structure. Each folder contains backups. My backups are manual and I usually backup after a major event or shoot.
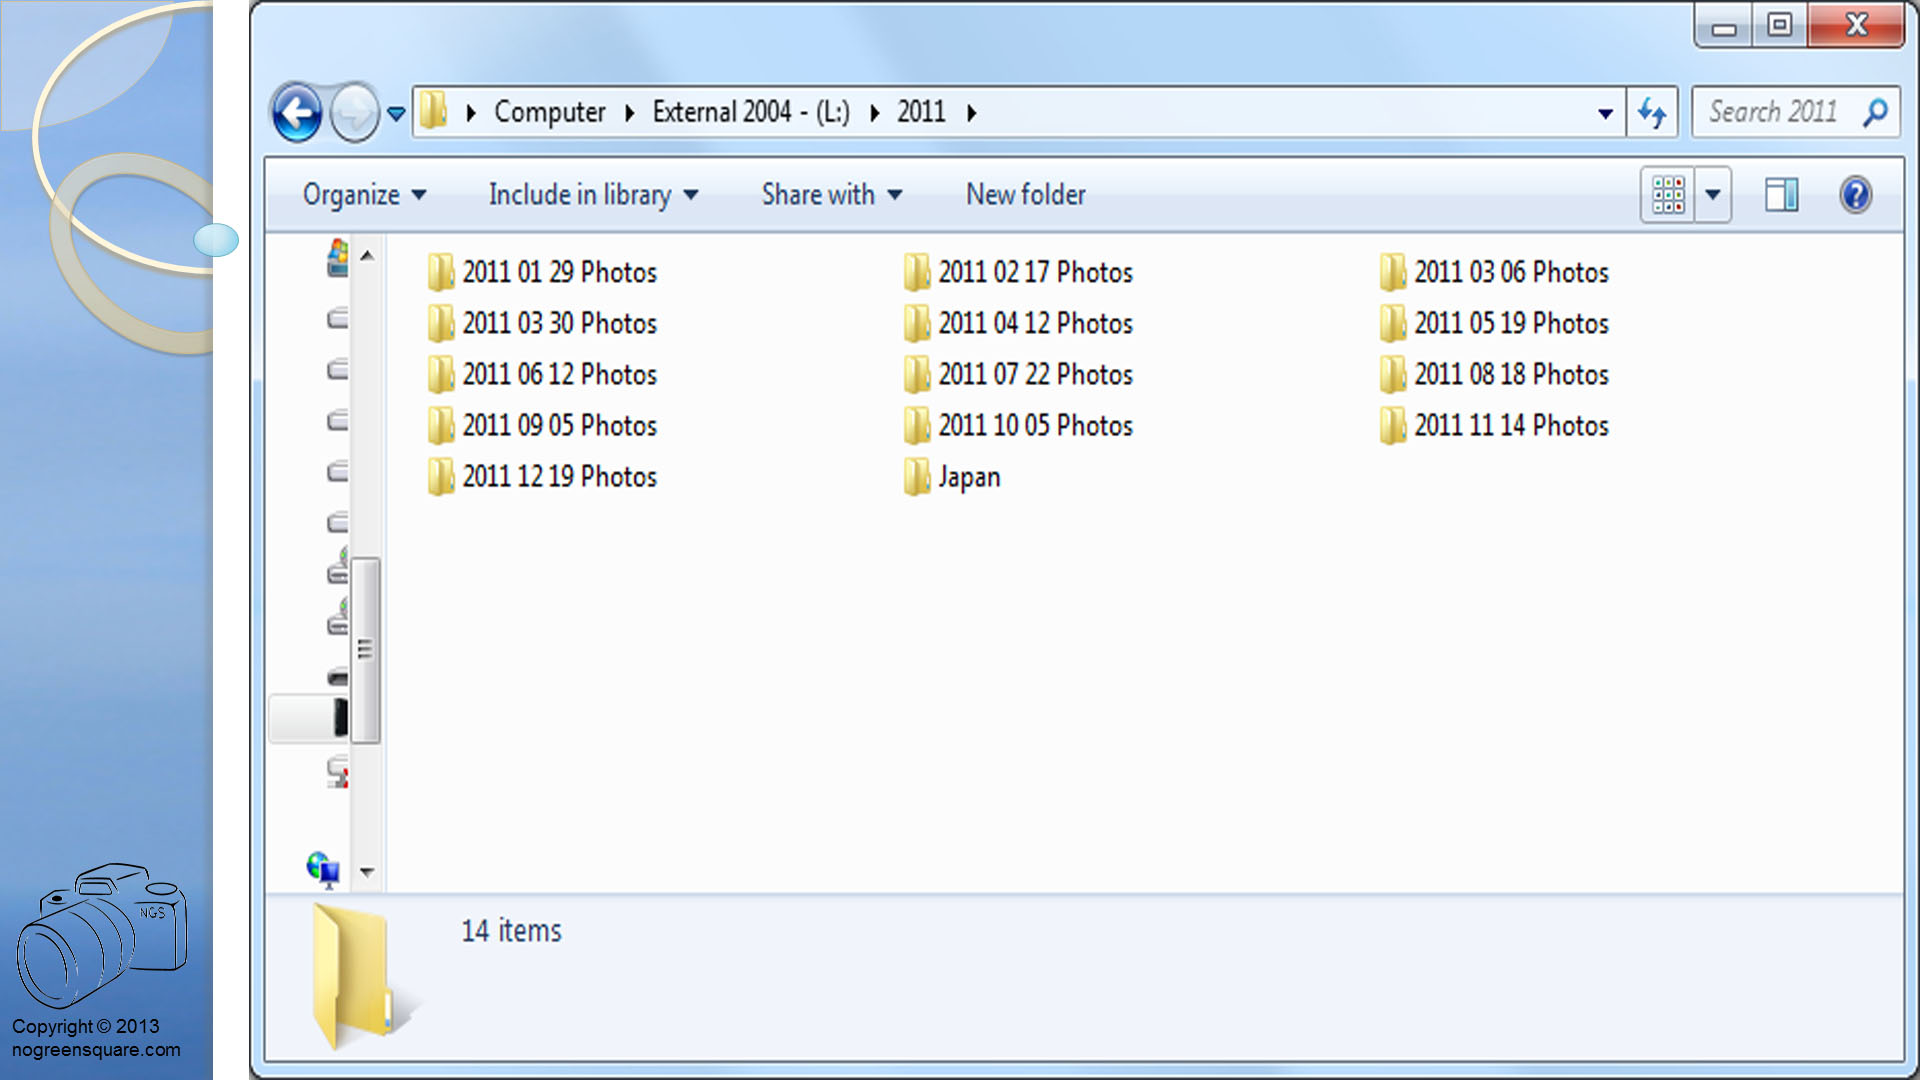
 This is what the 2011 folder looks like. Each folder is named as per the day I did the backup.
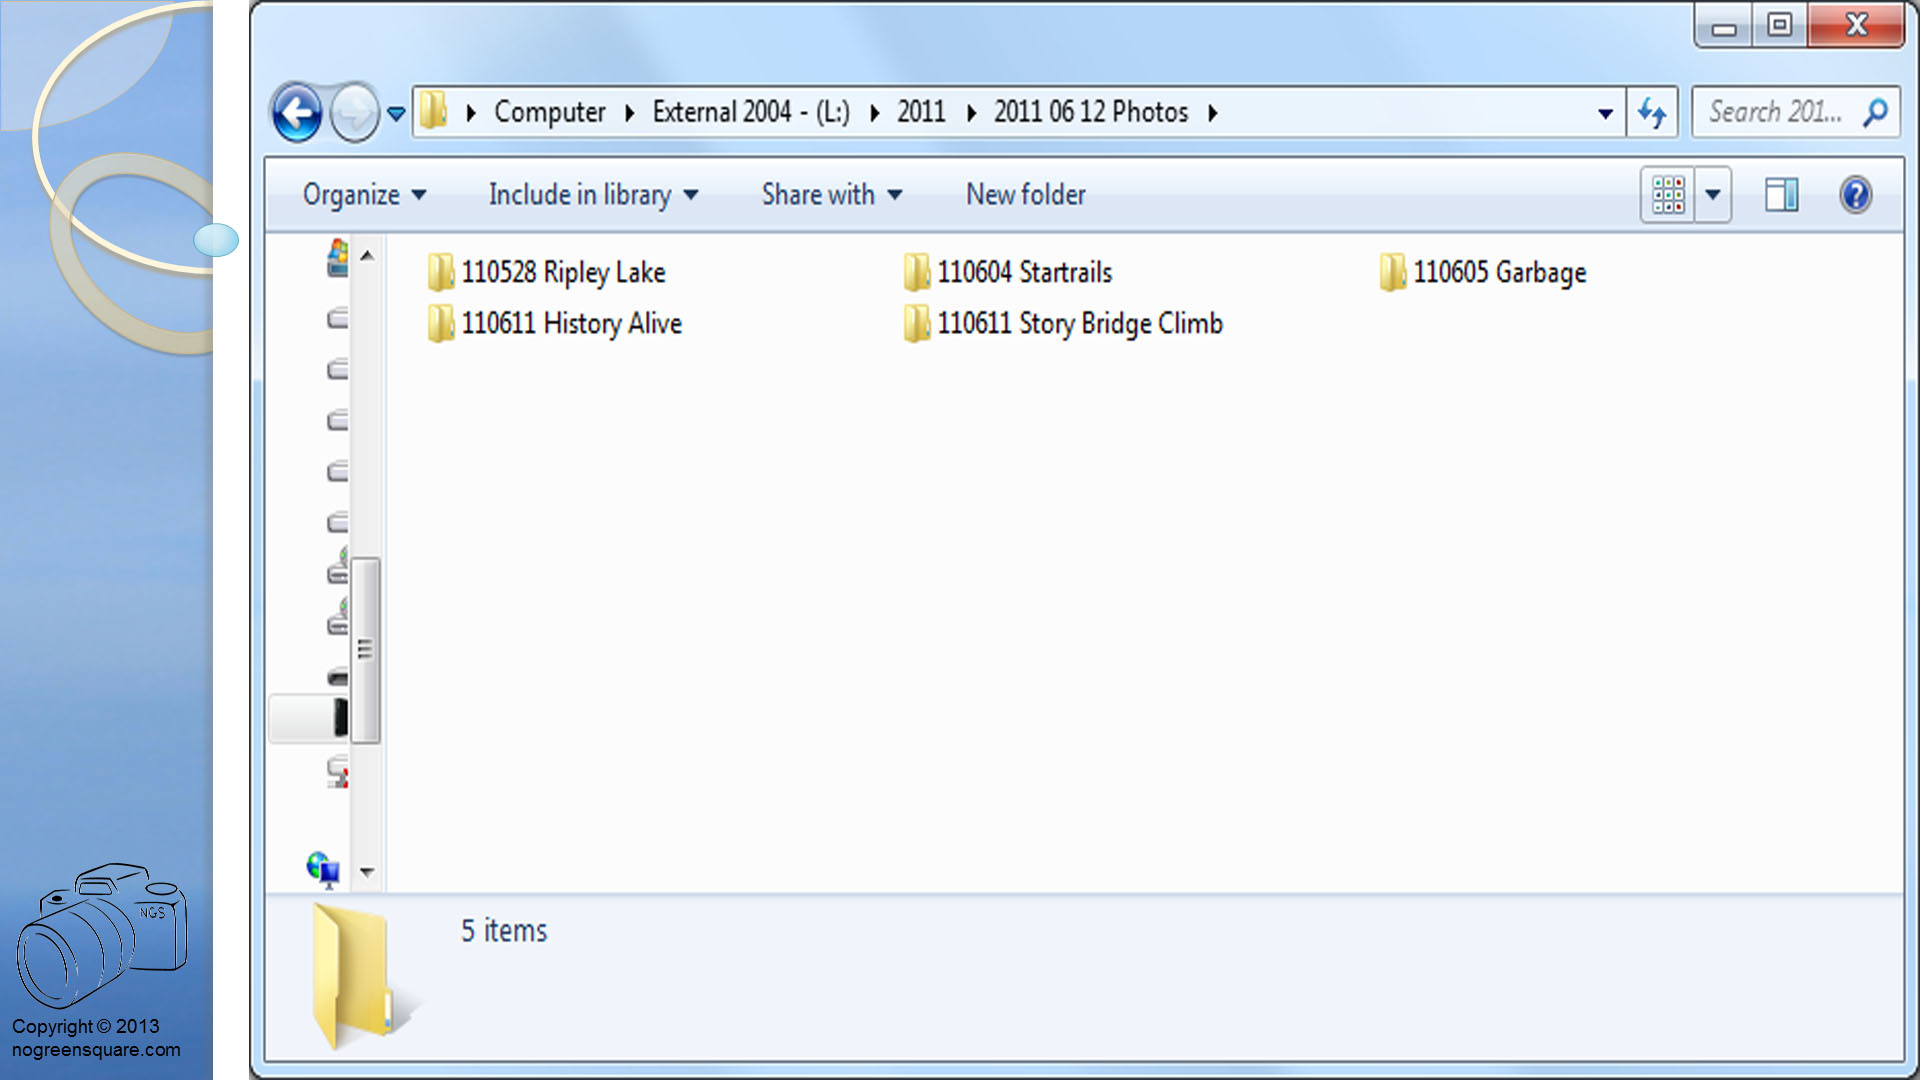
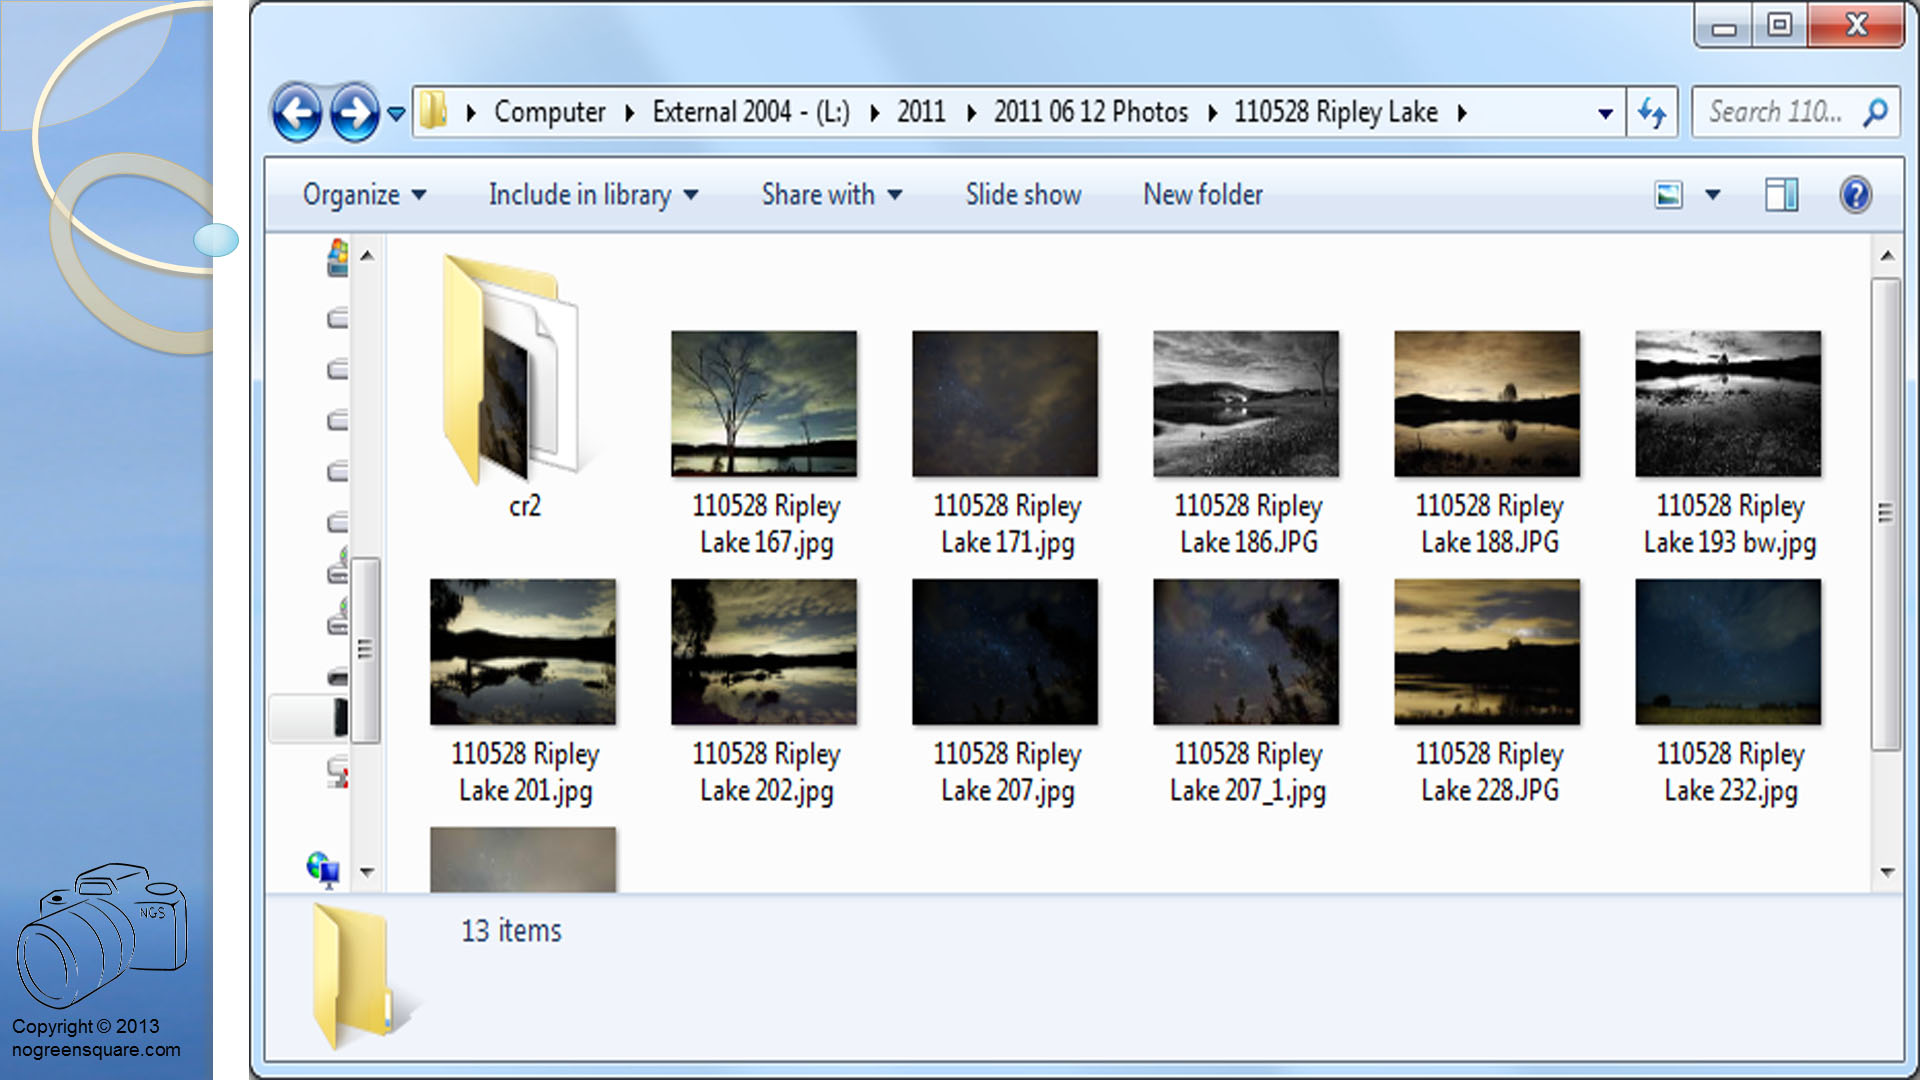
 If I open the 110528 Ripley Lake folder I will find the following jpgs each with the same file naming convention. And the RAW files are in the CR2 folder.


 I took the picture above in 2004 on a then new Canon 300D (using a 18-55 kit lens). The picture settings were F16 (aperture), 60 seconds (shutter speed), and ISO 100. I processed the image with the Canon Raw editing software supplied with the camera.
 I can now process that file with the latest Adobe Camera Raw Editor. You can see the many sliders and variables that can be used to adjust the look of the image. Please note that when you open the file, all the sliders are set to 0.
 In this image, I have moved the sliders, and the image has changed:


 Slow Shutter: the cars are so blurred they are not visible. All you can see is their headlights / tail lights.
 The picture above was taken in 2007 on a then new Canon 30D, the picture settings were Aperture F5.6 Shutter Speed 1.6 seconds and ISO 1250, the image to the left has been processed to look like it was taken on a 1000D at the same ISO, with newer technology that has better ISO, there is less noise.
 This picture was taken at 3200 at about 9.30 at night, the high number allowed me to take this picture where the only light available was moonlight. The Aperture was F2.8 and the shutter speed was 1/60th.
 This shot is a crop of the original shot to show the noise that was around with older cameras, this was taken on a Canon 300D, the settings were Aperture F3.5 Shutter speed 1/160th and ISO 1600, you can see the grain mostly in the darker areas of the image.
 I have reprocessed this image and reduced the noise but there is still a little evident. Newer cameras will do this for you in camera without the need for reprocessing.
 This image was taken in such a dark setting that the camera needed a torch to focus! The settings were Shutter speed 1/10th Aperture F4 and ISO 1600, the settings were used to bring out the background that was extremely dark, the couple were lit by two flashes.
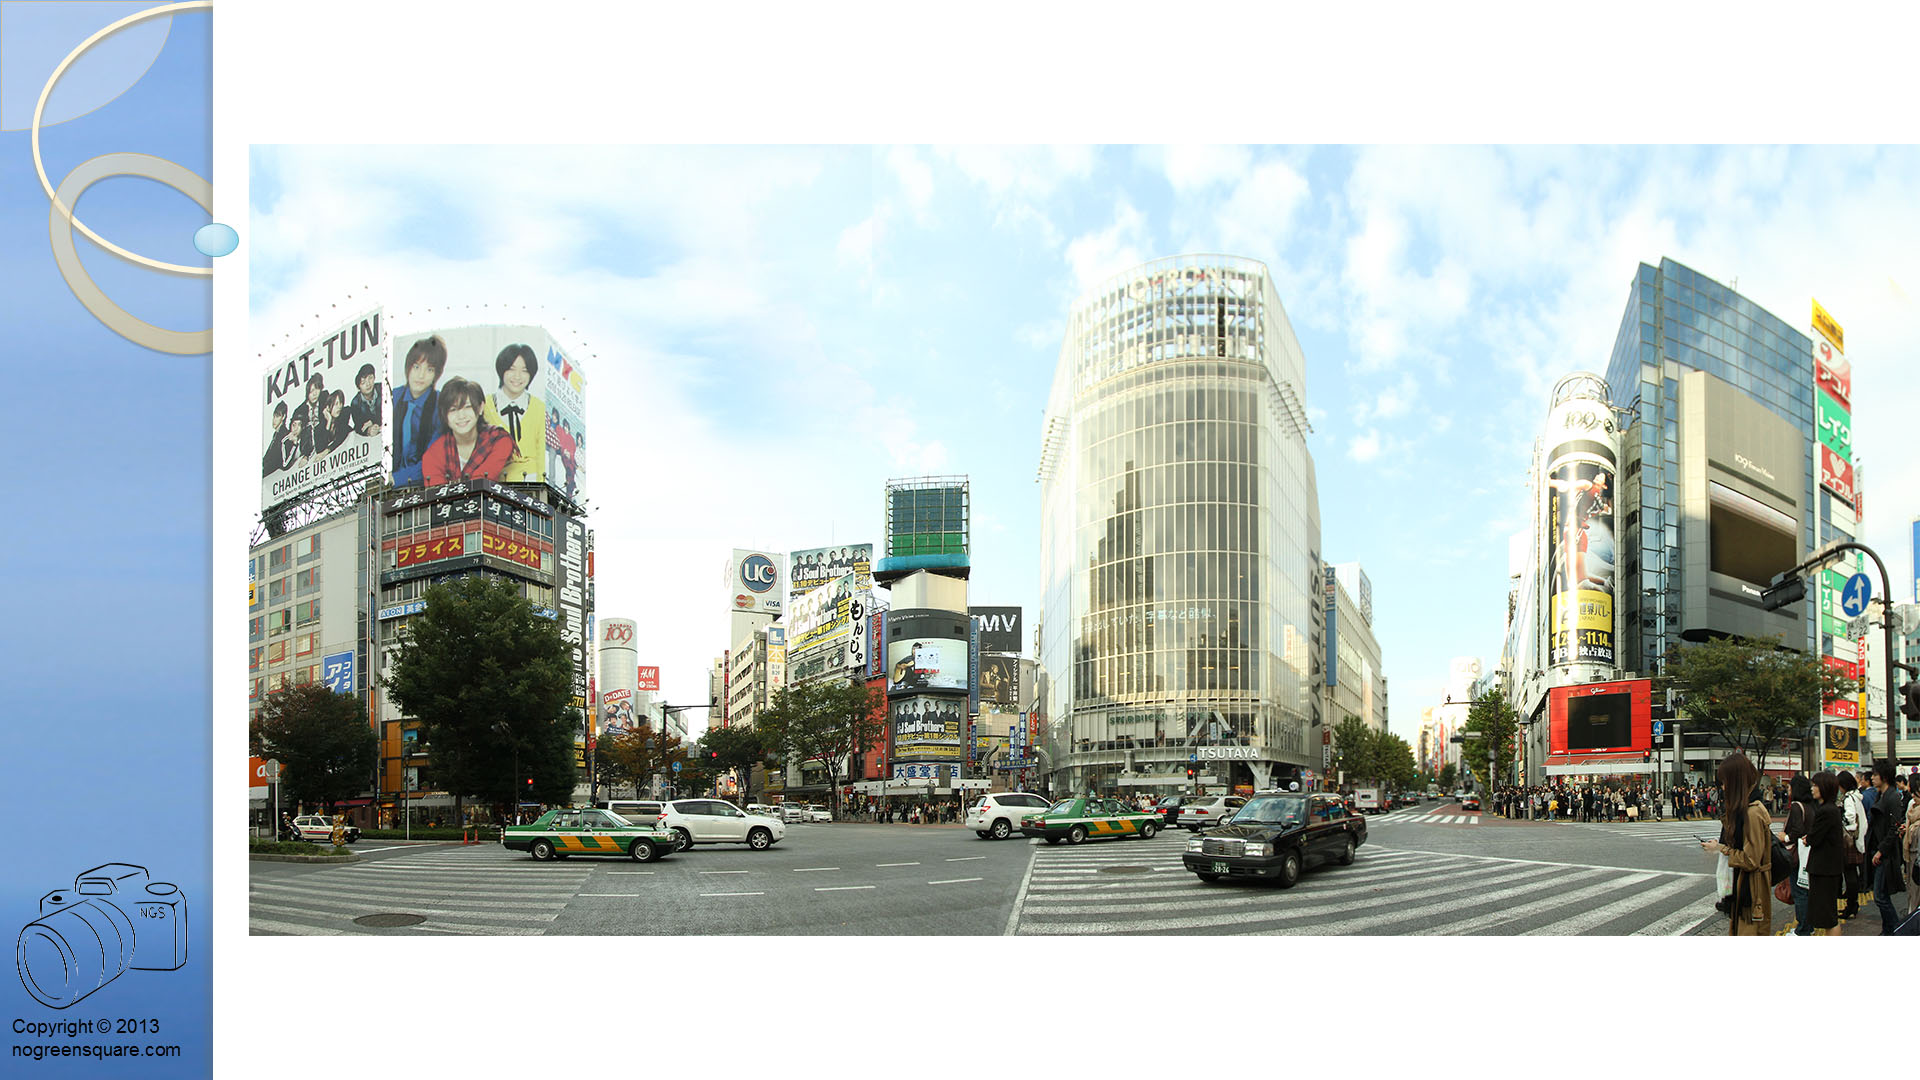