What is it?
A common definition of panoramic photos is based on its field of view and the physical dimensions of the print. Generally its more than the eye can see – so greater than 170°, and usually the rectangular photo is 2 times its height or greater.
What do I need to think about when taking one?
First, you need a wide scene to photograph, for example a landscape, cityscape or aerial view. Then you need to be mindful that you will be photographing usually more than 200°, which could mean that you are going to be shooting into different light situations. Also as you are photographing, moving objects (such as clouds, people or boats etc) may confuse the software – just be aware of what’s in the entire scene you intend to shoot.
You really want the software to do as little as possible for you, so its best to make the exposure the same, even the white balance. As a rule, when I’m shooting panoramas, I set the camera to manual and get a light reading across my image. I expose for the shadows, ie the darkest parts of the WHOLE panorama, and set my white balance to one setting.
Most of the software on the market works LEFT to RIGHT and TOP to BOTTOM, just like we read a book – so when shooting, follow this same sequence. Yes, you can shoot more than one row of pictures!
When taking your pictures swing the camera 90° so it’s taking a portrait, this will make your finished product taller, and give it a larger resolution.
Lastly OVERLAP your shots. I generally overlap my panoramic shots by 1/3, which means when I take my second shot, there is 2/3 of the old shot in my shot and 1/3 of the new shot. This will generally increase the number of images, but gives me the depth to be able to drop a shot out of the sequence if there is a moving object in it.
You can buy hardware like a Pano Head, which is motorised, and will move the camera and take the pictures for you. When you load the images into this products’ corresponding software it makes it even easier to stitch together.
I have taken all of my panoramic photos hand held, and used AutoPanoPro to do the stitching. It is very straight forward to use and has adjustments so you can straighten horizons and much more. But if you want to have a go and don’t want to spend any money, I have found some free software called Hugin. It is slower than AutoPanoPro and a little harder to get around, but has the same functionality to correct horizons and more. It’s still quite powerful and it’s FREE. There are many other programs you can use – these are my experiences with the above two.
What does it do to my pictures?
Panoramic photos allow you to show a wider perspective than standard, and will allow you to get a picture of something that is wider than you can currently take in one shot. It allows you to make images of cityscapes and landscapes with lots more detail.
Examples
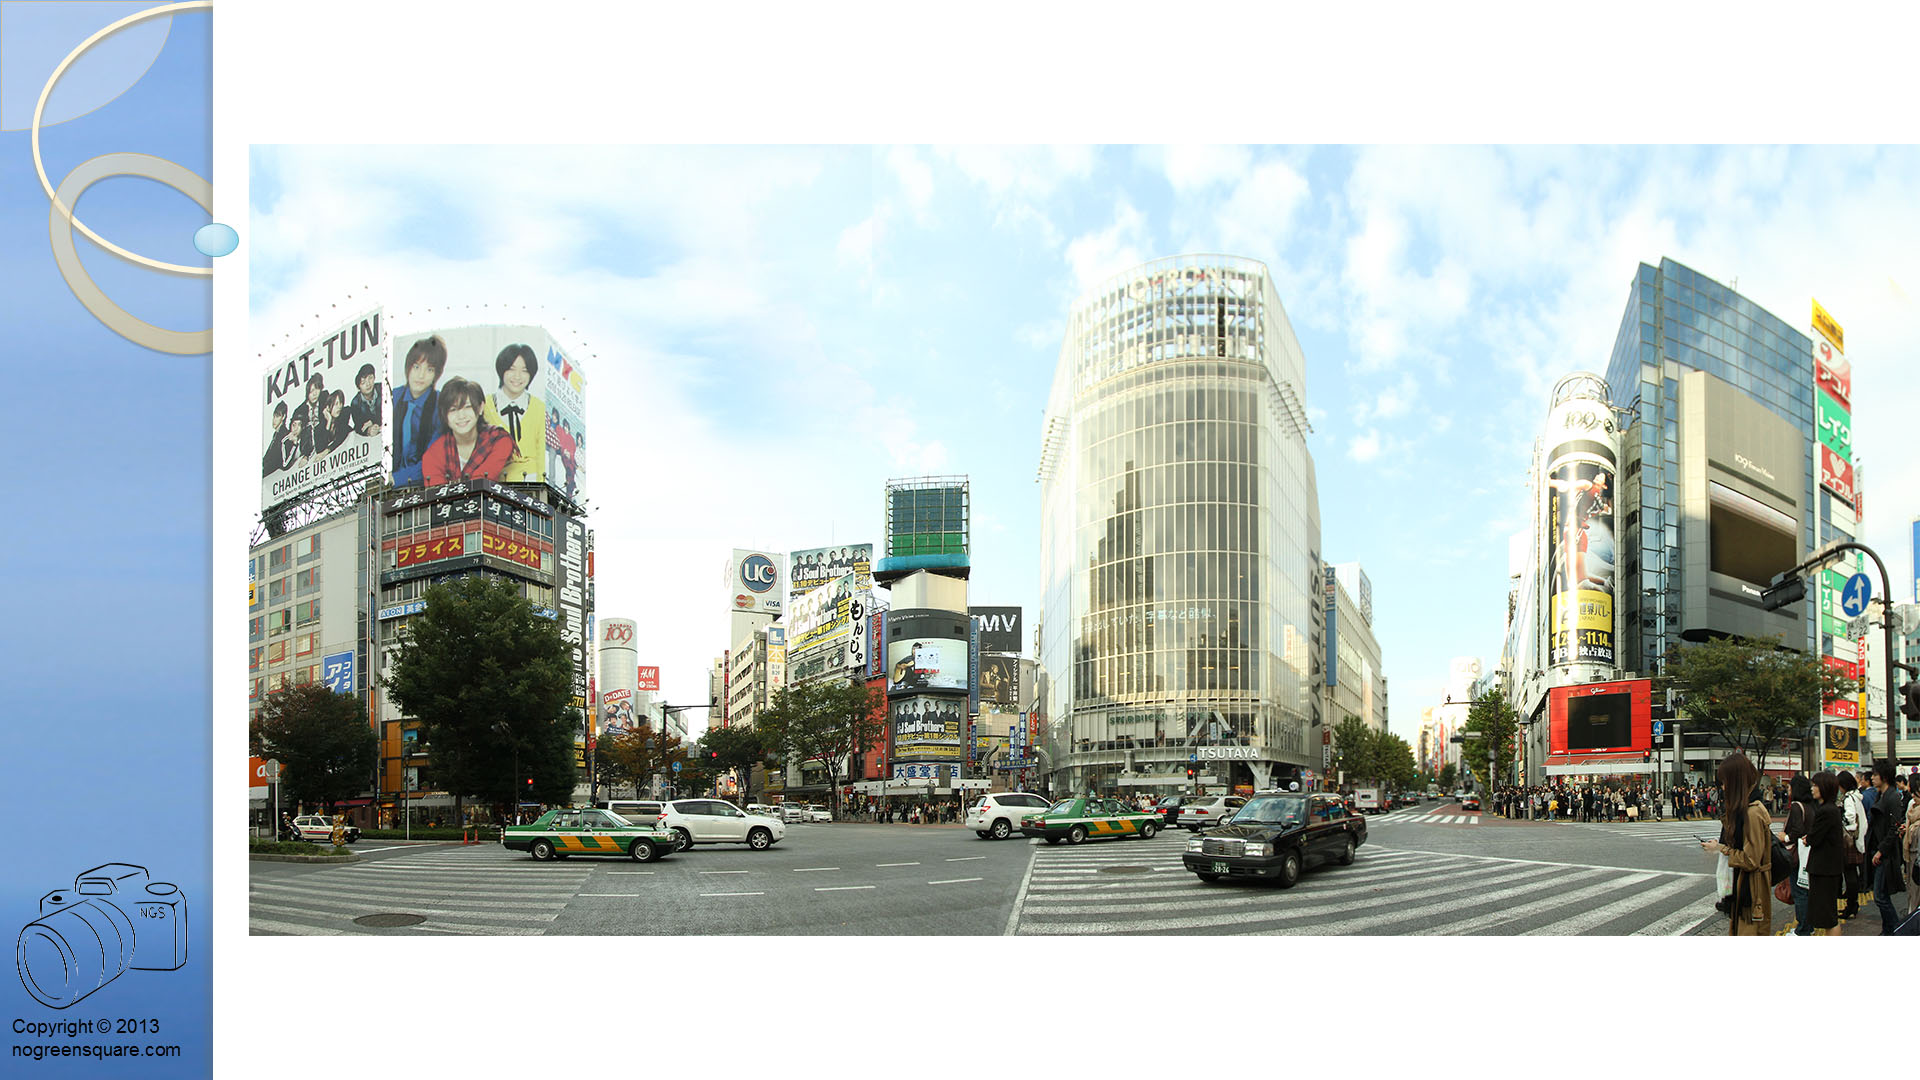
 Shibuya Crossing, Japan; 9 shots. Taken on a Canon EOS 7D at 10mm. If you look carefully, the taxi and white car appear twice as they were moving through the scene as I was taking the images.
 The Milky Way, 11 shots. Taken on a Canon EOS 5D Mark II, and at 18mm the left and right of the photo are opposite horizons.
 Moffat Beach, Australia; 41 shots. The exposure was set for the middle and right of the image and the sun has slightly blown out (created the very bright white areas) on the left.
 Brighton Jetty Classic 2010, Australia; 9 shots taken from a helicopter as it flew left to right.
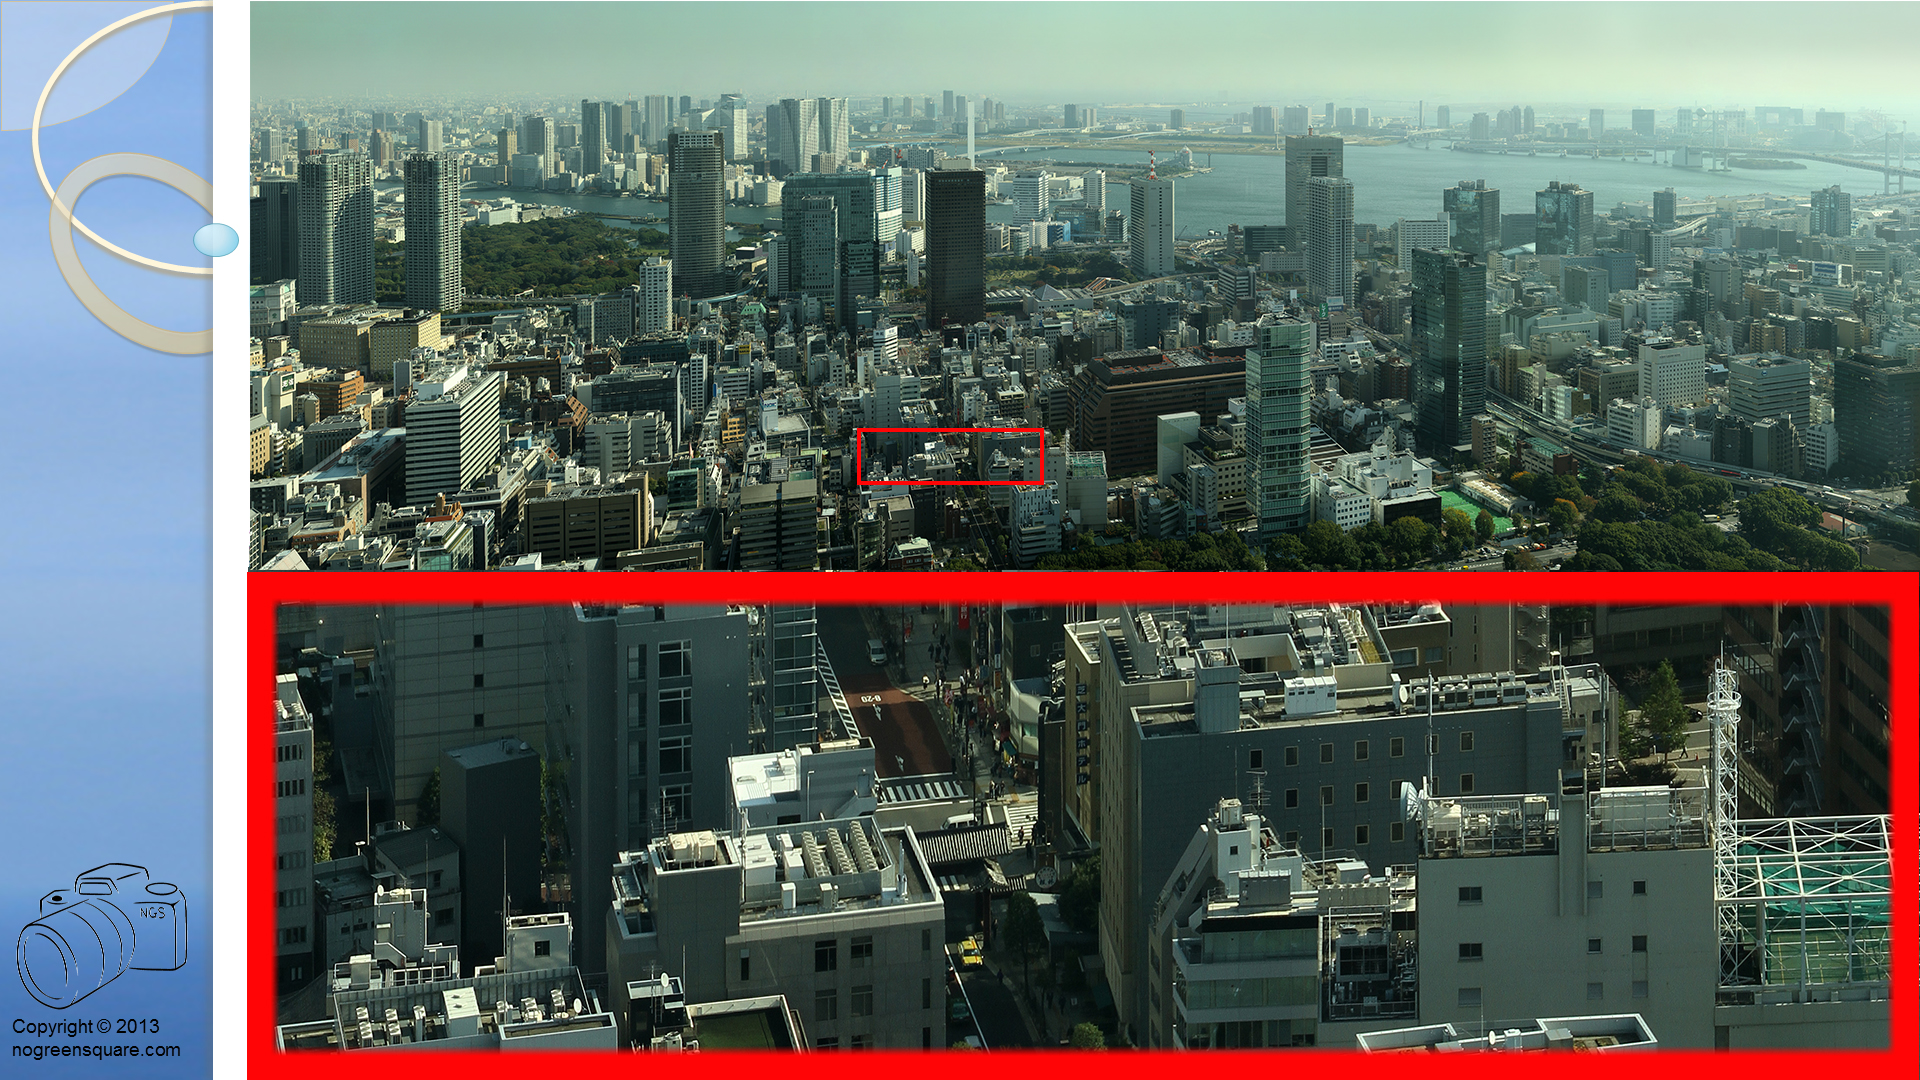
 Tokyo, Japan; 83 shots 3 rows high and 27 shots wide. Taken from the Tokyo Tower, the section in the large red rectangle is a crop of the small section in red on the main picture. This image could be printed 3m tall and would be about 27m long.
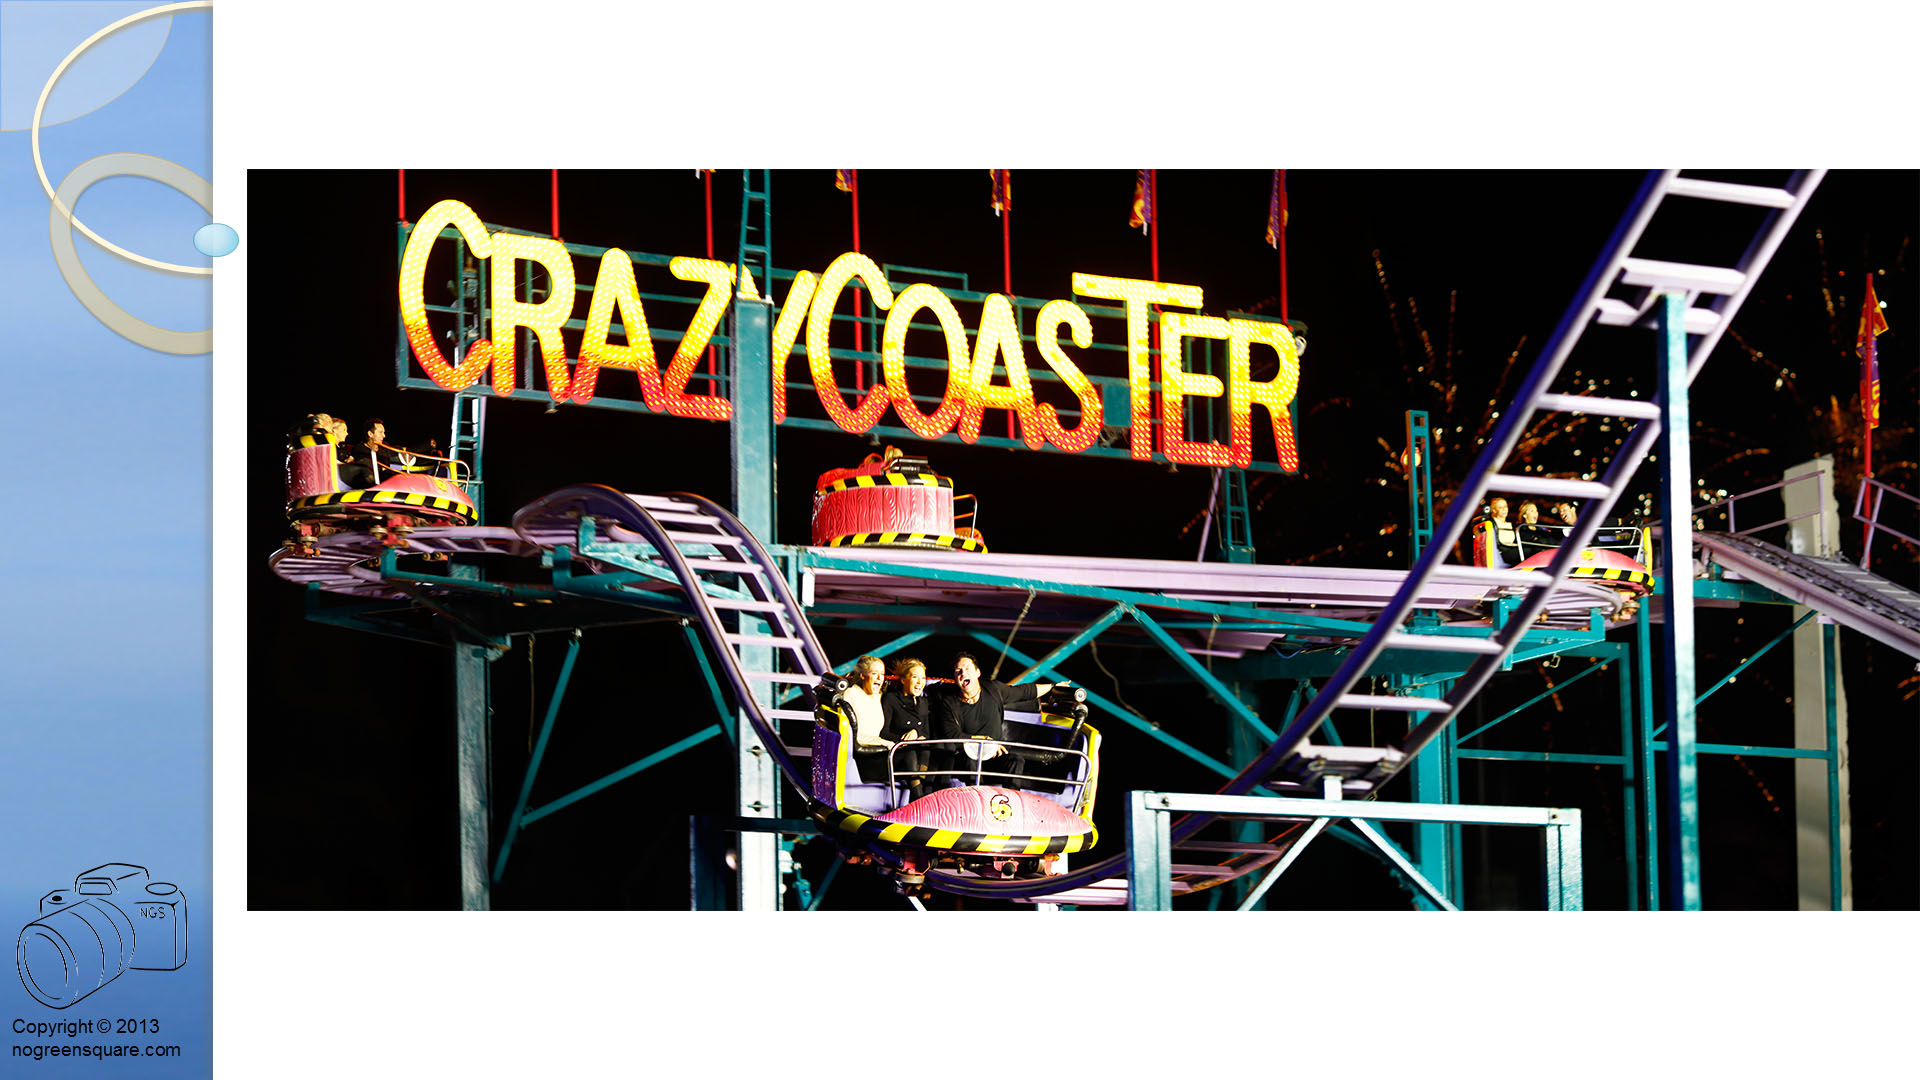
 Crazy Coaster, Brisbane Ekka 2012; These images were never shot to be a panorama, but I saw the opportunity to see if they would work, and it did. If you look carefully, the riders are the same in each car. So dont be scared to give something a go!
Try This
Take a 4 or 5 shot Panorama and have some fun editing it with Hugin. See if you like the outcome, and don’t forget the tips:
One thought on “Understanding Panoramic Photos”
Comments are closed.